Installing a Ceiling Fan with Light Kit: A Comprehensive Guide for Homeowners
Enhance the comfort and ambiance of your living space by installing a ceiling fan with light kit. Whether you're seeking a practical solution for air circulation or a decorative touch, this DIY project is approachable and rewarding. Here's a step-by-step guide to assist you in successfully installing your ceiling fan with light kit:
### Essential Materials and Tools:Before commencing the installation, gather all necessary materials and tools. You will require:
- Ceiling fan with light kit - Screwdriver - Drill - Electrical tape - Wire nuts - Safety glasses - Step ladder ### Safety Precautions:Prior to starting any electrical work, it's crucial to ensure safety. Follow these precautions:
- Turn off the power supply to the ceiling fan circuit at the main electrical panel. - Wear safety glasses throughout the installation process. - Use caution while handling electrical wires. ### Step-by-Step Installation:1. Preparation:
Locate the ceiling joists where the fan will be mounted. Determine the center point and mark it on the ceiling.
2. Mounting Bracket Installation:
Align the mounting bracket with the mark on the ceiling. Secure it to the ceiling joists using screws provided in the fan kit.
3. Electrical Wiring:
Connect the electrical wires of the fan to the wires in the ceiling electrical box using wire nuts. Ensure correct color matching: black to black, white to white, and green or bare wire to ground wire.
4. Fan Hanging:
Lift the fan into position and align it with the mounting bracket. Secure it by tightening the screws.
5. Light Kit Installation:
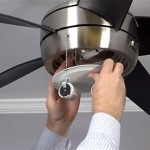
Depending on the fan model, follow the specific instructions to install the light kit. Typically, it involves attaching the light fixture to the fan canopy and connecting the wires.
6. Blade Installation:
Attach the fan blades to the fan motor housing using the provided screws.
7. Power Restoration:
Restore power to the fan circuit at the main electrical panel. Turn on the fan to confirm proper operation.
### Troubleshooting:If you encounter any issues during or after the installation, try the following troubleshooting steps:
- Check if all electrical connections are secure. - Ensure the fan blades are properly attached. - Verify the fan switch is in the "ON" position. - If the fan is not spinning, check if it is receiving power from the circuit breaker or fuse. ### Maintenance:To maintain the longevity and functionality of your ceiling fan with light kit, regular maintenance is essential:
- Clean the fan blades and light fixture regularly. - Lubricate the fan motor every few months. - Check for any loose screws or connections and tighten them as needed. ### Conclusion:Installing a ceiling fan with light kit is a manageable task for most homeowners. By following these instructions carefully and adhering to safety precautions, you can successfully enhance your home's comfort and style. Enjoy the added air circulation and ambient lighting that a ceiling fan with light kit brings to your living space.

Ceiling Fan Light Kit Installation How To

Wiring A Ceiling Fan And Light With Diagrams Ptr

How To Install A Ceiling Fan Light Kit Shockley Electric

How To Add A Light Kit Your Ceiling Fan Mr Electric

Ceiling Fan Light Kit Installation How To

Home Decorators Collection Palm Cove 44 In Indoor Outdoor Led Natural Iron Ceiling Fan With Light Kit Downrod And Reversible Motor 51544 The Depot

Lighting Ceiling Fan Installation From Lowe S

Hampton Bay Rockport Ii 52 In Indoor Matte Black Led Ceiling Fan With Light Kit Downrod And Reversible Blades Included 92365 The Home Depot

Mainstays 44 White Indoor Ceiling Fan With Light 5 Blades Pull Chains Reverse Airflow Com

New Hampton Bay Riley 44 034 Indoor Led Ceiling Fan W Light Kit Amp Remote Control
Related Posts


