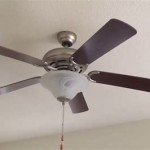
Adding a Ceiling Fan Light Kit: A Comprehensive Guide
Ceiling fans provide much-needed ventilation and comfort in a room. Adding a light kit can enhance the functionality of your ceiling fan, providing both illumination and air circulation. Here's a detailed guide on the essential aspects of adding a ceiling fan light kit:
1. Compatibility and Safety Considerations
Before purchasing a light kit, ensure it is compatible with your existing ceiling fan. Check the wattage and voltage requirements to ensure the kit is suitable for your fan's motor. Always prioritize safety by ensuring that the electrical connections are made properly by a qualified electrician.
2. Selecting the Right Light Kit
Consider the style, shape, and finish of the light kit to complement the décor of your room. Determine the desired wattage and light color to meet your lighting needs. Opt for kits with energy-efficient LED bulbs to minimize energy consumption and prolong their lifespan.
3. Gathering Tools and Materials
To successfully add a ceiling fan light kit, you will need the light kit itself, a screwdriver, wire strippers, electrical tape, and possibly a ladder or step stool. Ensure you have all the necessary tools and materials before starting the installation process.
4. Turning Off Electricity and Preparing the Fan
Safety is paramount. Turn off the power to the ceiling fan at the circuit breaker panel. Use a non-contact voltage tester to confirm that there is no power flowing to the fan before proceeding further. Remove the existing fan cover (if any) to expose the wiring.
5. Wiring the Light Kit
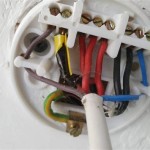
Identify the wires from the light kit and match them to the corresponding wires from the ceiling fan. Typically, black wires connect to black wires, white wires to white wires, and green or bare wires to the fan's ground wire. Secure the connections with wire nuts and insulate them with electrical tape.
6. Installing the Light Fixture
Depending on the light kit design, it may have a mounting bracket or canopy that attaches to the ceiling fan. Align the light fixture with the mounting points and secure it using the provided screws. Ensure it is level and stable before proceeding.
7. Inserting the Bulbs
Insert the LED bulbs into the light kit's sockets. Be careful not to touch the bulbs with bare hands, as this can shorten their lifespan. Turn on the power at the circuit breaker panel and test the light kit to ensure proper functionality.
8. Finishing Up
Once the light kit is installed and working correctly, replace the fan cover or shade (if removed). Ensure all screws and connections are tightened securely. Turn on the fan and adjust the light settings as desired.
Conclusion
Adding a ceiling fan light kit is a simple and effective way to enhance the functionality of your existing ceiling fan. By following these essential aspects and adhering to safety guidelines, you can successfully install a light kit and enjoy the benefits of both illumination and air circulation in your room.

Ceiling Fan Light Kit Installation How To

Wiring A Ceiling Fan And Light With Diagrams Ptr

Wiring A Ceiling Fan And Light With Diagrams Ptr

How To Install A Ceiling Fan Light Kit Shockley Electric

Can You Add A Light Fixture To Ceiling Fan Rings World The Local Business Directory For Small And Large Businesses

Changing Ceiling Fan Light Kit Doityourself Com Community Forums

Help Installing Ceiling Fan Light Kit R Askanelectrician

Wiring A Ceiling Fan And Light With Diagrams Ptr

Ceiling Fan Light Kit Installation How To

Help Installing Ceiling Fan Light Kit R Askanelectrician
Related Posts

