Replacing Recessed Lighting with a Ceiling Fan: A Room-Upgrading Transformation
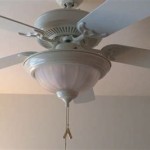
Replacing recessed lighting with a ceiling fan can elevate the functionality and aesthetics of any room. Whether you seek improved air circulation, enhanced illumination, or simply a stylish upgrade, this guide will provide comprehensive instructions and essential considerations to help you seamlessly execute this transformation.
### Essential Considerations1. Room Size and Ceiling Height: Consider the room's square footage and ceiling height when selecting a fan diameter. A rule of thumb is to choose a fan with blades that are approximately one-third the width of the room. For ceilings higher than 8 feet, consider a downrod to lower the fan for optimal airflow.
**2. Lighting Needs:
Determine the desired level of illumination. Fans with integrated light fixtures offer various lumen outputs. Choose a wattage appropriate for the room's size and light requirements. **3. Fan Speed and Airflow:
Fans with multiple speed settings provide flexibility for different situations. Higher speeds generate more airflow for cooling, while lower speeds create a gentle breeze for comfort. Consider the airflow needs of the room and the size of the fan blades. ### Step-by-Step Instructions **1. Gather Tools and Materials:
- New ceiling fan - Screwdriver - Electrical tape - Wire cutters - Ladder **2. Safety First:
- Turn off electrical power at the breaker box. - Use a voltage tester to confirm the power is off. **3. Remove the Recessed Lighting:
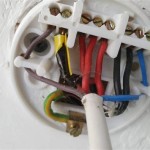
- Use a screwdriver to remove the screws holding the recessed light trim in place. - Carefully disconnect the electrical wires from the light fixture. - Pull the fixture out of the ceiling. **4. Install the Ceiling Fan:
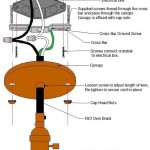
- Mount the fan mounting bracket to the electrical box. - Connect the electrical wires from the fan to the wires from the electrical box. - Secure the wires with electrical tape. - Hang the fan from the mounting bracket. **5. Attach the Blades:
- Install the fan blades according to the manufacturer's instructions. - Securely tighten all screws. **6. Add the Light Fixture:
- Connect the light fixture to the fan according to the manufacturer's instructions. - Insert the light bulbs. **7. Restore Power and Test:
- Restore power at the breaker box. - Turn on the fan and light fixture to ensure they are functioning properly. ### Benefits of Replacing Recessed Lighting with a Ceiling Fan **- Improved Air Circulation:
Ceiling fans create a cooling effect by circulating air, reducing the need for air conditioning. **- Enhanced Lighting:
Integrated light fixtures provide additional illumination, eliminating the need for separate light sources. **- Space Optimization:
Ceiling fans combine both lighting and air circulation, freeing up wall space and eliminating the need for multiple fixtures. **- Style and Comfort:
Ceiling fans come in a variety of styles and finishes, enhancing the aesthetics of any room while providing a comfortable breeze.
Avoid Strobing Try These Recessed Lights Layouts With Ceiling Fan

Ceiling Fan With Downlights Faq Lumera Living

Recessed Light Fixture Attempt Replacing Fan R Diwhy

8 Recessed Lighting Installation Tips For Diyers Bob Vila

Convert Recessed Light To Ceiling Fan Thecanconverter

Recessed Light Fixture Attempt Replacing Fan R Diwhy

4 Ways To Replace A Light Bulb In Ceiling Fan Wikihow

Replace Apartment Recessed Led Lights With Pendant R Lighting

Ceiling Fan Installation Electrician Orange Beach Al Mccord Electrical

4 Ways To Replace A Light Bulb In Ceiling Fan Wikihow
Related Posts

