How to Add Light Ceiling Fan: A Comprehensive Guide
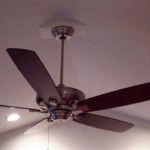
Installing a light ceiling fan can significantly enhance the aesthetics and functionality of a room. It provides ample illumination, circulates air for comfort, and adds a stylish touch to your decor. Whether you're a seasoned DIYer or a novice homeowner, this guide will guide you through the essential steps of adding a light ceiling fan to your home.
1. Safety Considerations:
Before you begin, always prioritize safety. Turn off the power supply to the circuit you'll be working on at the main electrical panel. Use a non-contact voltage tester to confirm that the circuit is de-energized. Wear gloves and safety glasses when handling electrical components.
2. Gather the Necessary Tools and Materials:
To complete this project, you'll need the following items:
- Light ceiling fan
- Mounting bracket
- Electrical wires
- Wire connectors
- Screwdriver
- Drill
- Level
- Step ladder
3. Install the Mounting Bracket:
Determine the location of the fan and mark the mounting point on the ceiling. Use the drill to create holes for the mounting bracket and secure it using the provided screws. Ensure that the bracket is level for proper fan alignment.
4. Electrical Wiring:
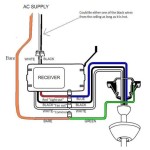
Connect the electrical wires from the fan to the wires in the ceiling junction box. Match the colors of the wires: black (hot) to black, white (neutral) to white, and green (ground) to green.
5. Hang the Fan Body:
Carefully lift the fan body and hang it onto the mounting bracket. Secure it using the provided screws or bolts.
6. Attach the Blades and Light Fixture:
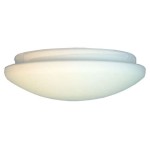
Install the fan blades according to the manufacturer's instructions. Then, attach the light fixture, ensuring it is securely connected.
7. Electrical Connections:
Connect the wires from the light fixture to the fan body and the ceiling junction box. Again, match the colors of the wires correctly.
8. Install the Remote Control or Wall Switch:
Follow the manufacturer's instructions to install the remote control or wall switch for controlling the fan and light.
9. Test and Adjust:
Turn on the power and test the fan. Ensure that it rotates smoothly and without any wobbling. If necessary, adjust the blade balance using the provided weights.
10. Enjoy Your New Light Ceiling Fan:
Congratulations! You have successfully installed your light ceiling fan. It will now provide you with ample illumination, comfortable air circulation, and a touch of style to your room.
Additional Tips:
- Choose a fan size appropriate for the room size.
- Consider the blade design and material for both efficiency and aesthetics.
- Use a ceiling fan with multiple speed settings for optimal comfort.
- Clean the fan regularly to maintain its performance and appearance.
- If you encounter any difficulties, do not hesitate to consult a qualified electrician.

Can You Add A Light Fixture To Ceiling Fan Rings World The Local Business Directory For Small And Large Businesses

Ceiling Fan Light Kit Installation How To

Wiring A Ceiling Fan And Light With Diagrams Ptr

Add A Drum Shade To Ceiling Fan In Minutes Thrifty Decor Diy And Organizing

Add A Drum Shade To Ceiling Fan In Minutes Thrifty Decor Diy And Organizing

Update An Old Fan On The With A Chic Shade To Makeover Your Ceiling

How To Add A Light Kit Your Ceiling Fan M R Electricians

Ceiling Fan Light Kit Installation How To

Wiring A Ceiling Fan And Light With Diagrams Ptr

Tutorial Ceiling Fan Light Eco English Wiki
Related Posts

