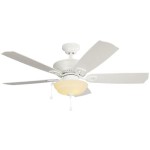
How to Install a Ceiling Light Fan Fixture
Installing a ceiling light fan fixture can be a great way to improve the style and functionality of any room. However, it is important to take the proper precautions and follow the correct steps to ensure a safe and successful installation.
Here are the essential aspects of installing a ceiling light fan fixture:
1. Safety First
Before beginning any electrical work, it is crucial to turn off the power to the circuit you will be working on. To do this, locate the electrical panel and flip the corresponding breaker to the "off" position. Additionally, make sure that the fan is securely fastened to the ceiling joists to prevent any accidents.
2. Gather Your Materials
Before starting the installation, gather all necessary materials, including the ceiling fan, mounting hardware, wire cutters, electrical tape, and a screwdriver. Ensure that you have the correct size and type of wire for the installation.
3. Prepare the Electrical Wires
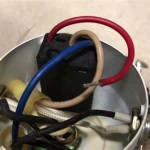
From the electrical box, identify the black (hot) wire, white (neutral) wire, and green (ground) wire. Strip about 1/2 inch of insulation from the ends of each wire. Twist the ends of the same color wires together.
4. Install the Mounting Bracket
Attach the mounting bracket to the electrical box using the provided screws. Ensure the bracket is level and secure before proceeding.
5. Connect the Wires
Connect the black wire from the fan to the black wire from the electrical box. Similarly, connect the white wire from the fan to the white wire from the electrical box. Finally, connect the green wire from the fan to the green wire from the electrical box using a wire nut.
6. Hang the Fan
Carefully lift the fan and align it with the mounting bracket. Secure the fan to the bracket using the provided screws.
7. Install the Light Kit (Optional)
If the fan includes a light kit, follow the manufacturer's instructions to install it. This may involve connecting additional wires or installing light bulbs.
8. Install the Fan Blades
Attach the fan blades to the fan motor using the provided screws. Ensure that the blades are securely fastened and balanced.
9. Restore Power
Once the installation is complete, restore power to the circuit by flipping the breaker back to the "on" position. Test the fan to ensure it is working correctly.
Additional Tips
For a more detailed guide on installing a ceiling light fan fixture, refer to the manufacturer's instructions. Additionally, consider seeking professional help from a licensed electrician if you are not comfortable performing electrical work yourself.

Replacing A Ceiling Fan Light With Regular Fixture Jlc
Replacing A Ceiling Fan Light With Regular Fixture Jlc

Wiring A Ceiling Fan And Light With Diagrams Ptr

How To Replace A Ceiling Fan With Pendant Light

How To Replace A Ceiling Fan With Pendant Light

Wiring A Ceiling Fan And Light With Diagrams Ptr

Wiring A Ceiling Fan And Light With Diagrams Ptr

Wiring A Ceiling Fan And Light With Diagrams Ptr
Ceiling Fan Light Fixture Replacement Ifixit Repair Guide

Ceiling Fan Light Kit Installation How To
Related Posts


