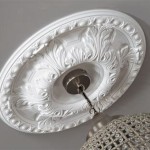
Essential Aspects of Ceiling Light Fixture Cover Removal
Maintaining a well-lit and aesthetically pleasing living space requires proper care and maintenance of ceiling light fixtures. Removing the cover of a light fixture is a crucial step in ensuring its functionality and cleanliness. However, mishandling this process can lead to damage or electrical hazards.
Understanding the essential aspects of ceiling light fixture cover removal is vital for safe and effective maintenance. Whether you're a seasoned DIY enthusiast or tackling this task for the first time, this article will provide you with comprehensive guidance to help you navigate the process effortlessly.
1. Safety Precautions
Electrical work poses inherent risks, making safety precautions paramount. Before starting any work, ensure the power to the fixture is turned off at the circuit breaker or fuse box. Wear appropriate safety gloves and protective eyewear to prevent accidental contact with sharp edges or electrical components.
2. Fixture Type Identification
Ceiling light fixtures come in various types, each with unique cover removal methods. Identify the fixture type, such as recessed, semi-flush mount, or chandelier, to determine the appropriate approach.
3. Removal Techniques
Once the fixture type is identified, locate the screws, latches, or clips that hold the cover in place. Use the appropriate tools, such as a screwdriver or pliers, to carefully remove these fasteners. Avoid using excessive force to prevent damage.
4. Cover Extraction
Once the fasteners are removed, gently pull down or rotate the cover to detach it from the fixture. Exercise caution to avoid dropping the cover or damaging surrounding components.
5. Cleaning and Inspection
With the cover removed, you can access the bulb and other components for cleaning and inspection. Use a soft cloth to wipe away dust and debris. Check for any loose wires or connections that may need attention.
6. Reassembly and Restoration
After cleaning and inspection, carefully align the cover and secure it back into place. Tighten the screws or fasten the clips properly. Restore power to the fixture and test its functionality.
Conclusion
By following these essential aspects of ceiling light fixture cover removal, you can safely and effectively maintain your lighting fixtures. Remember to prioritize safety, identify the fixture type, use proper removal techniques, and carefully clean and inspect the components. With this knowledge, you can ensure your ceiling light fixtures continue to illuminate your living spaces flawlessly.

How To Remove The Light Cover In Room Frequently Asked Questions Leopalace21 Chintai Als Al Apartments And Monthly Mansion For Single Tenants

How To Change A Ceiling Light Making Maanita

How To Remove Ceiling Light Cover With No S All Coast Inspections

How To Remove Ceiling Light Fixture Doityourself Com Community Forums

How To Remove This Ceiling Light Cover Trying Replace Lightbulbs R Howto

How To Replace Install A Light Fixture The Art Of Manliness

How To Remove Ceiling Light Cover No S

How To Remove Ceiling Light Cover A Simple Process Homes Valy

How To Remove Light Fixtures Like A Pro When Painting Any Ceiling

How To Replace A Ceiling Light Fixture Dengarden
Related Posts

