Wiring Up A Ceiling Light: A Comprehensive Guide for Homeowners
Installing a ceiling light can be a daunting task for novice homeowners, but with the right tools and know-how, it's a project you can easily conquer. This article will walk you through every step of the process, ensuring a safe and efficient installation.
Tools and Materials
Before you begin, gather the following tools and materials:
- Ceiling light fixture
- Screwdriver
- Wire strippers
- Electrical tape
- Drywall anchors (if needed)
- Stud finder
- Safety glasses
Safety First
Before starting any electrical work, it's crucial to ensure your safety by following these precautions:
- Turn off the power to the circuit at the breaker panel.
- Wear safety glasses to protect your eyes from flying debris.
- Use a non-conductive ladder to access the light fixture.
Preparing the Light Fixture
Unpack the light fixture and remove any protective packaging or hardware. Study the instructions provided by the manufacturer, as different fixtures may require specific mounting techniques.
Locate the electrical wires coming out of the light fixture: a black wire (hot), a white wire (neutral), and a green or bare copper wire (ground). If the wires are not already capped or insulated, strip about half an inch of insulation off the ends.
Mounting the Fixture
Determine the location of the light fixture on the ceiling. Use a stud finder to locate the nearest ceiling joist for optimal support. If the ceiling is drywall, you may need to use drywall anchors to secure the mounting bracket.
If the light fixture comes with a mounting bracket, attach it to the electrical box or directly to the ceiling using the provided screws.
Connecting the Wires
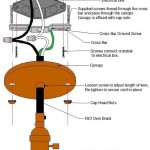
Connect the light fixture wires to the wires coming from the ceiling electrical box. Match black to black (hot), white to white (neutral), and green or bare copper to green or bare copper (ground).
Twist the ends of the wires together and secure them with electrical tape. Ensure that the connections are tight and insulated.
Mounting the Light Fixture
Carefully lift the light fixture onto the mounting bracket or electrical box and secure it with the provided screws or bolts. Make sure the fixture is level and fits snugly.
Finishing Up
Restore power to the circuit at the breaker panel. Test the light fixture to ensure it is functioning properly.
Install the light bulbs or fixtures according to the manufacturer's instructions. Clean up any debris or tools from the work area.
Troubleshooting
If the light fixture does not turn on, double-check your wiring connections. Ensure that the black (hot) wire is connected to the black wire in the ceiling box, the white (neutral) wire to the white wire, and the green or bare copper (ground) wire to the green or bare copper wire.
If the light fixture is flickering, loose wiring or a faulty bulb may be the cause. Tighten all wire connections and replace any faulty bulbs.

Jim Lawrence Flush Lights Fitting Guide

Inside The Circuit Pendant Lighting Light Switch Wiring Homeowner Faqs

Wiring A Ceiling Fan And Light With Diagrams Ptr

How To Install A Ceiling Light Fixture Diy Family Handyman

Replacing A Ceiling Fan Light With Regular Fixture Jlc

Mounting Light Fixtures Fine Homebuilding

How To Hang A Ceiling Light

Extending A Lighting Circuit Step By Guide And
Replacing A Ceiling Fan Light With Regular Fixture Jlc

How To Install A Ceiling Light Fixture Diy Family Handyman
Related Posts

