Ceiling Downlights Removal: A Comprehensive Guide
Ceiling downlights are a popular lighting solution for both residential and commercial spaces. They provide a sleek and modern look, and can be used to create a variety of lighting effects. However, there may come a time when you need to remove ceiling downlights, whether it's for a remodel, repair, or replacement. Here's a comprehensive guide to help you safely and efficiently remove ceiling downlights:
1. Safety First
Before you begin any electrical work, it's essential to turn off the power to the circuit that supplies the downlights. You can do this by flipping the breaker or removing the fuse in your electrical panel. Once the power is off, use a non-contact voltage tester to confirm that the circuit is indeed dead.
2. Remove the Trim
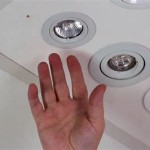
Most downlights have a trim ring that holds the light fixture in place. To remove the trim, gently pry it away from the ceiling using a putty knife or a flat-head screwdriver. Be careful not to damage the trim or the ceiling.
3. Disconnect the Wiring
Once the trim is removed, you will see the electrical wires that connect the downlight to the circuit. Before disconnecting the wires, make sure to note which wire is connected to which terminal. This will help you reconnect the wires correctly when you reinstall the downlight.
4. Remove the Housing
The housing of the downlight is usually held in place by springs or clips. To remove the housing, gently squeeze the springs or clips and pull the housing down. Be careful not to drop the housing, as it can be heavy.
5. Remove the Bulb
Once the housing is removed, you can remove the bulb by simply unscrewing it.
6. Inspect the Wiring
Before reinstalling the downlight, take a moment to inspect the wiring. Look for any signs of damage, such as frayed wires or loose connections. If you find any damage, it's important to repair it before reconnecting the wires.
7. Reinstall the Downlight
To reinstall the downlight, simply reverse the steps you took to remove it. Start by inserting the bulb into the housing. Then, connect the wires to the terminals on the housing, making sure to match the colors of the wires to the colors of the terminals. Finally, push the housing back into the ceiling and secure it with the springs or clips.
8. Turn on the Power
Once the downlight is reinstalled, turn on the power to the circuit. The downlight should now be working properly.
Conclusion
Removing ceiling downlights is a relatively simple process that can be completed in a few minutes. By following the steps outlined in this guide, you can safely and efficiently remove your downlights and prepare your ceiling for new lighting fixtures or repairs.

How To Remove A Downlight Without Damaging The Ceiling E Green Electrical

How To Change Downlights Or Recessed Lights In False Ceiling Electrician Singapore Recommended Services

Do You Need An Electrician To Replace Led Downlights Ledmyplace

How To Change Downlights Install Led

How To Change A Led Downlight Bulb Easily Do It Yourself

How To Remove Led Downlight R Ausrenovation

Trimless Recessed Lighting Explained Full Guide With Tips
Installation Downlight Removal And Leroy Merlin South

How Do You Remove Ceiling Downlights Page 1 Homes Gardens And Diy Pistonheads

Are Downlights Safe All You Need To Know About Space
Related Posts


