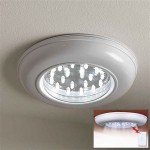
How to Replace a Ceiling Light Fixture
Replacing a ceiling light fixture is a relatively simple task that can be completed in a few steps. However, it is important to take the necessary safety precautions and follow the instructions carefully to avoid any accidents.
Before you begin, you will need to gather the following tools and materials:
- New ceiling light fixture
- Screwdriver
- Wire cutters
- Electrical tape
- Ladder
Once you have gathered your tools and materials, you can begin the process of replacing your ceiling light fixture.
Safety First
Before you begin any electrical work, it is important to turn off the power to the light fixture at the breaker panel. This will help to prevent any accidents from occurring.
Removing the Old Fixture
Once the power is off, you can begin removing the old light fixture. First, remove the screws that are holding the fixture in place. Then, carefully pull the fixture down from the ceiling. Be careful not to damage the wires or the ceiling.
Preparing the Wires
Once the old fixture is removed, you will need to prepare the wires for the new fixture. First, use the wire cutters to cut the wires about 6 inches from the ceiling. Then, strip the insulation off the ends of the wires about 1 inch.
Connecting the Wires
Now, you can connect the wires from the new fixture to the wires from the ceiling. Make sure to match the colors of the wires. Connect the black wire from the fixture to the black wire from the ceiling, the white wire from the fixture to the white wire from the ceiling, and the green wire from the fixture to the green wire from the ceiling.
Once the wires are connected, use electrical tape to secure the connections.
Mounting the New Fixture
Now, you can mount the new fixture to the ceiling. First, place the mounting bracket over the wires. Then, screw the mounting bracket into the ceiling.
Once the mounting bracket is in place, you can attach the light fixture to the bracket. Be careful not to overtighten the screws.
Turning on the Power
Once the new fixture is mounted, you can turn on the power at the breaker panel. The new light fixture should now be working.
Conclusion
Replacing a ceiling light fixture is a relatively simple task that can be completed in a few steps. However, it is important to take the necessary safety precautions and follow the instructions carefully to avoid any accidents.
:max_bytes(150000):strip_icc()/how-to-replace-ceiling-light-fixture-1824657-02-078c80a354ee404e8ca25455b15fef14.jpg?strip=all)
How To Hang A Ceiling Light Step By Guide

How To Change A Ceiling Light Fixture Step By Guide

How To Install A Ceiling Light Fixture Diyer S Guide Bob Vila

How To Replace Install A Light Fixture The Art Of Manliness

Replacing A Ceiling Fan Light With Regular Fixture Jlc

How To Switch Out A Light Fixture Tinged Blue

How To Replace An Old Fluorescent Light Fixture Young House Love

How To Change Your Light Fixture In Seven Easy Steps A Pinch Of Joy

Easy Ways To Replace An Led Recessed Light Bulb 13 Steps

How To Replace A Ceiling Light Fixture Dengarden
Related Posts

