How to Replace a Flush Mount Ceiling Light Fixture: A Comprehensive Guide
Replacing a flush mount ceiling light fixture may seem daunting, but with the right tools and know-how, it's a relatively straightforward DIY project. Whether you want to update the style of your fixture or freshen up the lighting in a room, this article will guide you through the process step-by-step.
Before You Start: Safety First
Before you begin, it's crucial to ensure safety. Turn off the power to the fixture at the breaker panel or fuse box. Then, make sure the light has cooled completely before handling it to avoid burns.
Tools and Materials You'll Need:
- Replacement flush mount light fixture
- Screwdriver
- Wire cutters/strippers
- Electrical tape
- Safety goggles (optional)
Step-by-Step Instructions:
1. Remove the Old Fixture:Locate the screws holding the fixture to the ceiling and remove them. Carefully detach the fixture from the electrical box. If there are any wires connected to the fixture, disconnect them using your wire cutters.
2. Prepare the Electrical Box:Inspect the electrical box for any damage. If necessary, replace the box or call a licensed electrician. Check the wires and confirm they are securely attached to the box.
3. Connect the Wires:Identify the white (neutral), black (hot), and green (ground) wires on both the fixture and the electrical box. Connect the same color wires together using electrical tape. Wrap the tape around the connection securely to prevent any shorts.
4. Mount the Fixture:Align the fixture with the electrical box and lift it into place. Secure it to the box using the included screws. Tighten the screws but avoid overtightening.
5. Install the Globe/Bulb:Depending on the type of fixture, insert a compatible globe or bulb into the socket. Ensure it's firmly seated.
6. Turn on the Power:Return to the breaker panel or fuse box and turn on the power to the fixture. Test the light to ensure it's working properly.
Tips and Tricks:
- Purchase a fixture with a similar size and type as the original.
- If the electrical box is not secure, call a qualified electrician.
- Use a non-contact voltage tester to confirm that the power is off before removing the old fixture.
- If you're not confident in your DIY skills, consult a professional electrician for assistance.
Conclusion:
Replacing a flush mount ceiling light fixture is a simple task that can enhance the aesthetics and functionality of your home. By following these step-by-step instructions, you can safely and effectively complete this DIY project with minimal effort.

How To Change Bulb In Flush Mount Ceiling Light Stunning Kitchen
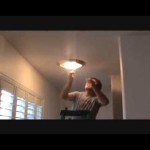
How To Remove Flush Mount Ceiling Fixture Physics Forums

Ceiling Light Fixture Model Obj 1 Flush Mount

How To Replace Light Bulb In Dome Ceiling Fixture Fans With

11 Inch Dimmable Led Flush Mount Ceiling Light Torchstar

Light Cozy Flushmount Lighting With Awesome Contemporary Flush

Kichler 10828ni Three Light Flush Mount Ceiling Fixture Bulb

Commercial Electric 7 In Bright White Integrated Led Flushmount

How To Install A Ceiling Light Fixture From Scratch Retrofit Brace

Replace Ceiling Light Fixture Aidnature And Simple
Related Posts
