How to Replace a Ceiling Fan Light Bulb: A Step-by-Step Guide
Replaceable light bulbs in ceiling fans help provide ample lighting in rooms, and changing them out is typically an easy task that can be completed in a few simple steps. Here's a comprehensive guide to help you through the process:
Materials You'll Need:
- New light bulb that is compatible with your ceiling fan
- Step ladder or stool
- Gloves (optional, but recommended)
Safety Precautions:
- Turn off the power to the ceiling fan at the circuit breaker or fuse box before starting.
- Allow the bulb to cool completely before handling it, as it may be hot.
Step-by-Step Instructions:
- Turn off the power. Locate the circuit breaker or fuse box that controls the power to the ceiling fan and switch it off. This step is crucial to prevent electrical shock.
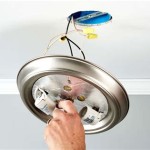
- Remove the glass cover. Depending on the design of your ceiling fan, the glass cover may be held in place by screws or clips. Gently remove the screws or unclip the cover and set it aside in a safe place.
- Locate the light bulb. Once the glass cover is removed, you will see the light bulb located at the center of the fan. It is usually attached to a socket or base.
- Unscrew the bulb. Grasp the bulb firmly and turn it counterclockwise to unscrew it from the socket or base. If the bulb is stuck, use a pair of pliers or a light bulb removal tool to help you.
- Insert the new bulb. Take the new bulb and carefully insert it into the socket or base. Turn it clockwise to tighten it securely.
- Replace the glass cover. Align the glass cover with the ceiling fan and gently press it into place. Secure it with screws or clips, depending on your fan's design.
- Turn on the power. Return to the circuit breaker or fuse box and switch the power back on. The light bulb should now be functioning.
Additional Tips:
- Replace all the bulbs at once, even if only one has burned out. This helps ensure that the bulbs have a similar lifespan and light output.
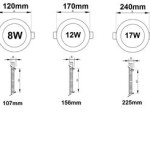
- Use a light bulb that is compatible with your ceiling fan's wattage and voltage specifications. Exceeding these limits can damage the fan or pose a fire hazard.
- If you encounter any difficulty or have concerns, do not hesitate to contact a qualified electrician for assistance.

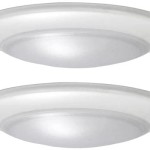
4 Ways To Replace A Light Bulb In Ceiling Fan Wikihow

4 Ways To Replace A Light Bulb In Ceiling Fan Wikihow

4 Ways To Replace A Light Bulb In Ceiling Fan Wikihow

4 Ways To Replace A Light Bulb In Ceiling Fan Wikihow

How To Replace A Ceiling Fan Light Kit Smafan Com

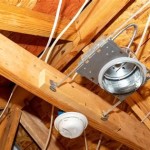
How To Replace A Ceiling Fan Light Socket Doityourself Com

How Do I Change This Lightbulb Bunnings Work Community

4 Ways To Replace A Light Bulb In Ceiling Fan Wikihow

How To Replace Bulb In Ceiling Fan Light Tiktok Search

Replacing The Light On A Ceiling Fan Universal Fans
Related Posts