Essential Aspects of Installing Drop Ceiling Lights
Drop ceiling lights are a versatile and efficient lighting solution for commercial and residential spaces. They offer a sleek, modern look and provide even illumination. Installing drop ceiling lights is a relatively straightforward process that can be completed by DIY enthusiasts with some basic electrical knowledge.
1. Safety Precautions
Before starting any electrical work, it's crucial to ensure safety. Turn off the power supply to the work area at the circuit breaker box. Wear appropriate safety gear, such as gloves and safety glasses. Use a non-contact voltage tester to confirm that the circuit is de-energized.
2. Determine Placement and Layout
Plan the placement of the drop ceiling lights to optimize illumination. Determine the spacing between lights and the distance from the ceiling. Mark the locations of the light fixtures on the ceiling grid.
3. Install the T-Bars
T-bars are the metal grid that supports the drop ceiling tiles and light fixtures. Install the main T-bars along the perimeter of the ceiling and parallel to the walls. Then, insert the cross T-bars perpendicular to the main bars to create a grid pattern.
4. Mount the Light Fixture Brackets
Light fixture brackets are used to attach the lights to the T-bars. Position the brackets at the marked locations on the grid and secure them with clips or screws.
5. Wire the Fixture
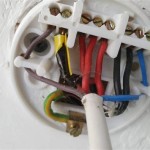
Connect the fixture's electrical wires to the wires in the ceiling electrical junction box. Use wire nuts to secure the connections and wrap electrical tape around them for insulation. Ensure that the connections are tight and meet electrical code.
6. Install the Drop Ceiling Tiles
Once the fixtures are wired, install the drop ceiling tiles around the lights. Place the tiles on the grid and push them into place. Use a putty knife or other flat object to smooth the tiles and ensure they are level.
7. Mount the Light Fixture
Lift the light fixture into place and attach it to the brackets using screws or clips. Make sure the fixture is securely fastened and aligned properly.
8. Restore Power and Test
After installation, restore power to the circuit and turn on the lights. Test each fixture to ensure it is functioning correctly and provides adequate illumination.
Tips
- Use a level to ensure that the lights are mounted horizontally.
- Choose light bulbs or LED fixtures that provide the desired lighting level.
- Consider using dimmable lights for energy efficiency and ambiance control.
- If you are not comfortable with electrical work, hire a qualified electrician for installation.

How To Install Recessed Lights In A Drop Ceiling Temecula Handyman
How To Install Lighting In Your Ceiling Kanopi By Armstrong

How To Install A Drop Ceiling Yourself

Drop Ceiling Installation How To Install A Homeserve Usa

Install Lighting In A Suspended Ceiling Doityourself Com

How To Install A Led Panel Light 5 Step Quick Guide Any Lamp

Heradesign Suspended Ceiling Installation John Atkinson

How To Install Recessed Lights In A Drop Ceiling The Home Depot

Coffered Ceilings Lighting Luxplan

Drop Ceiling Tiles Installation Tips Diy Family Handyman
Related Posts


