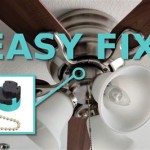
Essential Steps for Removing Flush Mount Ceiling Light Fixtures
Flush mount ceiling light fixtures are a common type of lighting in homes and businesses. They are installed directly against the ceiling, providing a clean and minimalist look. However, there may come a time when you need to remove a flush mount ceiling light fixture, such as when replacing it with a new one or making repairs. This guide will provide you with the essential steps for safely and effectively removing a flush mount ceiling light fixture.
Tools and Materials
Before starting, gather the necessary tools and materials:
- Screwdriver (Phillips or flathead, depending on the fixture)
- Electrical tape
- Wire cutters or strippers
- Safety glasses
- Stepladder or chair
Safety Precautions
Before working on any electrical fixture, it is crucial to take safety precautions:
- Turn off the power to the fixture at the breaker panel.
- Wear safety glasses to protect your eyes from debris.
- If you are not comfortable working with electricity, consult a qualified electrician.
Step-by-Step Instructions
Follow these steps to remove the flush mount ceiling light fixture:
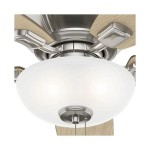
1. Remove the Shade or Globe:Using a screwdriver, remove the screws that hold the shade or globe in place and carefully detach it from the fixture.
2. Disconnect the Wires:Identify the electrical wires connected to the fixture. Wrap electrical tape around the ends of the wires to prevent accidental contact. Using wire cutters or strippers, cut the wires, leaving about 6 inches of length.
3. Remove the Mounting Bracket:Locate the screws that secure the mounting bracket to the electrical box in the ceiling. Remove these screws and carefully detach the mounting bracket from the box. Gently pull the fixture downward to separate it from the mounting bracket.
4. Inspect the Electrical Box:Once the fixture is removed, inspect the electrical box in the ceiling for any damage or loose wires. If any issues are found, contact a qualified electrician for repairs.
5. Prepare for Reinstallation:If you plan to reinstall a new fixture, prepare the wires by stripping the insulation from the ends. Ensure the wires are long enough to reach the terminal screws on the new fixture.
6. Reinstall or Dispose of the Fixture:If reinstalling the fixture, connect the wires to the terminal screws on the new fixture and secure it to the mounting bracket. If disposing of the fixture, wrap the exposed wires with electrical tape and store it safely.
Tips
Here are some additional tips to keep in mind:
- If the fixture is particularly heavy, consider using a helper to assist you.
- Take pictures of the wiring before disconnecting the wires for reference during reinstallation.
- Dispose of old fixtures responsibly by recycling them at an electronics recycling center.
Conclusion
By following these steps carefully, you can safely and effectively remove a flush mount ceiling light fixture. Remember to take the necessary safety precautions and consult a qualified electrician if you encounter any difficulties or have concerns about the electrical system.

Replacing Flush Mount Light With Pendant

How To Remove Flush Mount Ceiling Fixture

Remove These Flush Mount Lights R Howto

How To Change A Ceiling Light Making Maanita

How To Remove A Light Fixture In 6 Steps Apartment Therapy

How To Remove Flush Mount Light Fixture R Howto

How To Remove This Light Fixture R Homemaintenance

Commercial Electric 13 In Selectable Led Flush Mount With Night Light Optional White And Brushed Nickel Trim Rings 5 Pack 56584191 5pk The Home Depot

Changing A Bulb In Flush Mount Fixture Doityourself Com Community Forums

How To Open Twist Off The Cover Of Some Really Stupid Awkward Flush Mounted Ceiling Light Dome Fittings Fixtures Replace Change Bulb My Technical Blog
Related Posts