Install Ceiling Fan To Light Switch
Installing a ceiling fan to a light switch can be a great way to improve the functionality and aesthetics of your home. With a few simple tools and a bit of know-how, you can easily connect your ceiling fan to your light switch, allowing you to control both the fan and the lights with a single switch.
In this article, we will provide you with a step-by-step guide on how to install a ceiling fan to a light switch, including the necessary tools and materials, safety precautions, and detailed instructions. Whether you are a seasoned DIY enthusiast or a complete novice, this guide will empower you to complete the installation safely and efficiently.
Tools and Materials
- Ceiling fan
- Light switch
- Electrical tape
- Wire nuts
- Screwdriver
- Drill
- Electrical tester
Safety Precautions
- Turn off the power at the breaker box before starting any electrical work.
- Use caution when handling electrical wires.
- If you are not comfortable working with electricity, consult a qualified electrician.
Step-by-Step Instructions
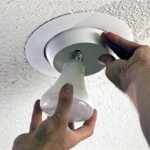
- Remove the old light fixture. Turn off the power at the breaker box and remove the old light fixture from the ceiling.
- Install the ceiling fan mounting bracket. Secure the ceiling fan mounting bracket to the electrical box on the ceiling using the provided screws.
- Connect the wires. Connect the black wire from the ceiling fan to the black wire from the light switch using a wire nut. Connect the white wire from the ceiling fan to the white wire from the light switch using a wire nut. Connect the ground wire from the ceiling fan to the ground wire from the light switch using a wire nut.
- Wrap the connections with electrical tape. Wrap the connections with electrical tape to insulate them and prevent short circuits.
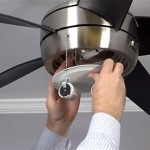
- Hang the ceiling fan. Lift the ceiling fan onto the mounting bracket and secure it with the provided screws.
- Install the light switch. Install the light switch into the electrical box on the wall.
- Turn on the power and test the fan. Turn on the power at the breaker box and test the ceiling fan and light switch to ensure they are working properly.
Tips
- If your ceiling fan has a remote control, you can connect it to the light switch using the provided receiver.
- If you are replacing an old ceiling fan with a new one, make sure that the new fan is compatible with the existing electrical box and mounting bracket.
- If you have any doubts about the installation process, consult a qualified electrician.
Conclusion
Installing a ceiling fan to a light switch is a relatively simple project that can be completed in a few hours. By following the steps outlined in this guide, you can safely and easily connect your ceiling fan to your light switch, allowing you to enjoy the benefits of both a fan and a light fixture with the convenience of a single switch.
How To Wire A Ceiling Fan Light Switch Quora

Wiring A Ceiling Fan And Light With Diagrams Ptr

Wiring A Ceiling Fan And Light With Diagrams Ptr
Replacing A Ceiling Fan Light With Regular Fixture Jlc

Wiring A Ceiling Fan And Light With Diagrams Ptr

Wiring A Ceiling Fan And Light With Diagrams Ptr

Replacing A Ceiling Fan Light With Regular Fixture Jlc

Wiring A Ceiling Fan And Light With Diagrams Ptr

Wiring A Ceiling Fan And Light With Diagrams Ptr

Need Feedback On Wiring Fan And Switch With Smartswitches Projects Stories Smartthings Community
Related Posts


