Essential Steps to Remove a Fluorescent Light Fixture from the Ceiling
Fluorescent light fixtures are commonly used in commercial and industrial settings due to their energy efficiency and wide illumination coverage. However, when it's time to replace these fixtures or perform maintenance, it's crucial to follow specific steps to ensure safety and prevent potential hazards.
Safety Precautions
Before attempting to remove a fluorescent light fixture, always ensure proper safety measures:
- Turn off the power supply at the breaker panel or fuse box.
- Wear gloves and safety glasses for protection.
- Use a ladder or step stool for stability, especially if the fixture is mounted high on the ceiling.
Step 1: Remove Diffuser or Lens Cover
Locate the diffuser or lens cover on the fixture. It's usually held in place by clips or screws. Gently pry or unscrew the cover to access the bulbs and wiring.
Step 2: Disconnect Wires
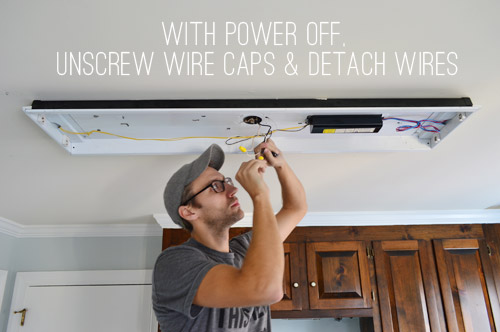
Inside the fixture, you'll see the electrical wires connected to the ballast and bulbs. Use a non-metallic screwdriver or insulated pliers to carefully disconnect the wires. Match the wire colors when reconnecting them later.
Step 3: Remove Bulbs
Grab the fluorescent bulbs firmly and rotate them counterclockwise to remove them from their sockets. Avoid touching the glass part of the bulbs directly as it can contain mercury.
Step 4: Remove Ballast
The ballast is a metal box that powers the fluorescent bulbs. It's usually mounted on the fixture with screws. Disconnect any wires connected to the ballast and unscrew the mounting screws to remove it.
Step 5: Detach Fixture from Ceiling
Once the ballast and bulbs are removed, the fixture is ready to be detached from the ceiling. It's typically secured by a mounting plate or bracket. Locate the screws or bolts holding the fixture in place and unscrew them to free the fixture.
Step 6: Disconnect Remaining Wires
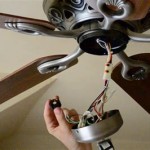
Before completely removing the fixture, check if there are any additional wires connected to it, such as ground wires or power supply wires. Disconnect these wires as well.
Step 7: Lower the Fixture
Carefully lower the fixture from the ceiling and place it on a stable surface. Handle the fixture gently to avoid damaging the wiring or glass components.
Conclusion
Removing a fluorescent light fixture from the ceiling requires attention to safety and proper execution. By following these essential steps, you can safely remove the fixture for maintenance, replacement, or other electrical work. Remember to always consult a qualified electrician for complex electrical tasks or if you encounter any unforeseen complications.

How To Replace An Old Fluorescent Light Fixture Young House Love

How To Replace An Old Fluorescent Light Fixture Young House Love

How To Replace An Old Fluorescent Light Fixture Young House Love

How To Replace An Old Fluorescent Light Fixture Young House Love

How To Replace An Old Fluorescent Light Fixture Young House Love

How To Replace An Old Fluorescent Light Fixture Young House Love

3 Easy Ways To Remove A Fluorescent Light Wikihow

Difficult To Remove Lens From Fluorescent Fixture Doityourself Com Community Forums

3 Easy Ways To Remove A Fluorescent Light Wikihow

Removing A Fluorescent Kitchen Light Box The Kim Six Fix
Related Posts


