Essential Aspects of Changing a Light Fixture on a High Ceiling
Replacing a light fixture on a high ceiling can be a daunting task, but with the right preparation and tools, it can be done safely and efficiently. Here are the essential aspects to consider when changing a light fixture on a high ceiling:
Safety First:
Always turn off the power to the fixture at the circuit breaker before attempting any work. Use a sturdy ladder or scaffolding to reach the fixture, and make sure it is stable and secure. Wear gloves and safety glasses to protect yourself from debris or electrical shock.
Gather the Necessary Tools:
You will need the following tools: a screwdriver (Phillips or flathead, depending on the fixture), a wire stripper, electrical tape, a voltage tester, and possibly a ladder or scaffolding. If the fixture is heavy, you may also need a ceiling hook or support brace.
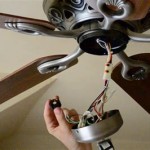
Disconnect the Old Fixture:
Once the power is off, remove the screws or bolts that hold the fixture to the ceiling. Carefully lower the fixture, being mindful of any wires or connections. Disconnect the wires from the fixture by loosening the wire nuts or terminals. Use the voltage tester to ensure the wires are dead.
Prepare the New Fixture:
Lay out the new fixture and separate the wires. Strip about 1/2 inch of insulation from the ends of the wires. Connect the wires to the fixture, matching the colors (black to black, white to white, green or bare to ground). Secure the connections with wire nuts and wrap them with electrical tape.
Mount the New Fixture:
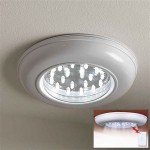
If necessary, attach a ceiling hook or support brace to the ceiling. Carefully lift the fixture into place and align it with the mounting screws or bolts. Tighten the screws or bolts securely to hold the fixture in place.
Reconnect the Power:
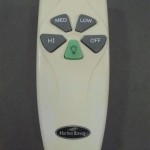
Turn on the power at the circuit breaker and test the fixture to ensure it is working properly. If the fixture does not turn on, check the connections and make sure the wires are securely fastened.
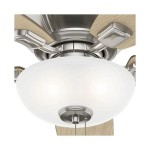
Finishing Touches:
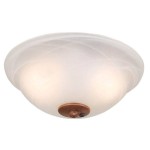
Once the fixture is installed and working, attach any shades or diffusers. Clean up any debris and dispose of the old fixture properly. Congratulations! You have successfully changed a light fixture on a high ceiling.

How To Change Light Bulb In High Ceiling Home Inspection Geeks

Home Lightbulb Scaffold

How To Change Light Bulb In High Ceiling Tools For Kitchen Bathroom

Who Can I Hire For Light Bulb Changing Services

25 Of The Best High Ceiling Chandelier Ideas Lightopia

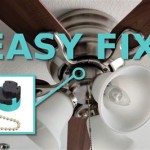
How To Replace An Old Fluorescent Light Fixture Young House Love

How To Change Light Bulb In High Ceiling Home Inspection Geeks

How To Change Light Bulb In High Ceiling Home Inspection Geeks

How To Change Light Bulbs In High Ceilings Quora

10 Of The Best Vaulted Ceiling Lighting Ideas Lightopia
Related Posts