How to Hang a Chandelier from a High Ceiling
Adding a chandelier to a high-ceilinged room can instantly elevate the space, creating a dramatic focal point and enhancing the overall ambiance. However, hanging a chandelier from a high ceiling can be a daunting task, requiring careful planning and precision. Here's a comprehensive guide to help you tackle this project safely and successfully:
1. Safety First
Before you begin, ensure your safety by gathering the necessary equipment, including a sturdy step ladder, safety glasses, gloves, and an electrical tester. Turn off the electricity at the circuit breaker to prevent electrical shock.
2. Determine Mounting Location
Plan the placement of your chandelier carefully. Use a measuring tape to determine the center of the room and mark the desired location on the ceiling. Ensure there are no obstructions, such as pipes or wires, at the mounting point.
3. Calculate Drop Length
Calculate the drop length, which is the distance from the ceiling to the bottom of the chandelier. Consider the room's height, furniture layout, and overall aesthetic preferences. A general rule of thumb is to have the bottom of the chandelier roughly 30-36 inches above the table or main seating area.
4. Install Mounting Bracket
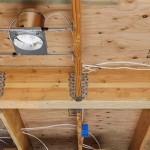
Locate the ceiling joists using a stud finder. Drill pilot holes and securely fasten the mounting bracket to the joists using appropriate screws or bolts. Ensure the bracket is level and can support the weight of the chandelier.
5. Wire the Chandelier
Connect the electrical wires within the chandelier according to the manufacturer's instructions. Use wire nuts and electrical tape to secure the connections. Attach the chandelier to the mounting bracket and tighten the screws.
6. Raise and Connect
Carefully lift the chandelier and guide the wires through the extension tube or chain. Use a hook or a wire connector to attach the chandelier to the mounting bracket. Once in place, connect the wires to the electrical wires in the ceiling box using wire nuts and tape.
7. Test and Level
Turn on the electricity and test the chandelier to ensure it is working correctly. Adjust the length of the extension tube or chain if necessary to achieve the desired drop length. Use a level to ensure the chandelier is hanging straight.
8. Bulb Installation and Decoration
Install the light bulbs and any decorative elements, such as crystals or pendants. Tighten the shades or covers securely.
9. Final Touches
Clean any fingerprints or smudges from the chandelier using a soft cloth. Stand back and admire your masterpiece, enjoying the enhanced ambiance and beauty it brings to your high-ceilinged space.

Wolberg Lighting And Design How To Properly Hang A Chandelie

Chandelier Height Guide Bellacor

Lighting Ideas For Vaulted Ceiling Soho Blog

Living Room Chandelier Installation Update Daly Digs

What S The Best Lighting For Vaulted Ceilings Amanda Katherine

A Stylish Stem Mount Pendant Light For High Ceilings Inspiration Barn Electric

Chandelier Height Guide Choosing The Right Size Lighting For Your Home

Best Feature Lighting Ideas For Vaulted Ceilings Loomlight

How To Size A Dining Room Chandelier 3 Easy Steps

Lighting Ideas For Vaulted Ceiling Soho Blog
Related Posts

