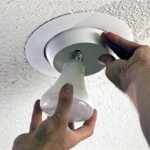
How to Add a Light Fixture Ceiling Fan: A Step-by-Step Guide
Adding a light fixture ceiling fan to your home can be a great way to improve both the style and functionality of your space. With a little planning and preparation, it's a project that even novice DIYers can tackle. Here's a step-by-step guide to help you through the process:
Step 1: Gather Your Tools and Materials
Before you begin, make sure you have all the necessary tools and materials. You'll need:
- Light fixture ceiling fan
- Screwdriver
- Wire stripper
- Electrical tape
- Mounting bracket
- Ceiling hook
- Step ladder
- Safety glasses
Step 2: Turn Off the Power
Safety first! Before you do anything else, turn off the power to the circuit that you'll be working on. You can do this by flipping the breaker or removing the fuse.
Step 3: Remove the Existing Light Fixture
If there's an existing light fixture in place, you'll need to remove it. Simply unscrew the mounting screws and carefully disconnect the wires. Make sure to wrap the wires with electrical tape to prevent any shorts.
Step 4: Install the Mounting Bracket
The mounting bracket will support the weight of the ceiling fan. Hold the bracket up to the ceiling and mark the location of the holes. Drill pilot holes and secure the bracket to the ceiling using the provided screws.
Step 5: Install the Ceiling Hook
The ceiling hook will provide a sturdy support for the fan. Screw the hook into the ceiling joist, making sure it's secure.
Step 6: Assemble the Ceiling Fan
Refer to the manufacturer's instructions for specific assembly instructions. In general, you'll need to attach the fan blades, motor housing, and light fixture to the mounting bracket.
Step 7: Connect the Wires
Connect the wires from the ceiling fan to the wires from the ceiling. Make sure to match the colors of the wires (black to black, white to white, and green to ground). Twist the wires together and secure them with wire nuts.
Step 8: Hang the Ceiling Fan
Lift the ceiling fan up and hang it on the ceiling hook. Secure the fan by tightening the screws on the mounting bracket.
Step 9: Restore Power
Turn the power back on at the circuit breaker or fuse box. Check that the ceiling fan is working properly by turning it on and checking the lights.
Tips for Safety and Success
Here are a few additional tips to help ensure a safe and successful installation:
- Make sure the ceiling fan is properly balanced before turning it on to prevent any wobbling or noise.
- If you're not comfortable working with electricity, it's always a good idea to consult with a qualified electrician.
- Follow the manufacturer's instructions carefully for specific installation requirements.
- Take your time and don't rush the process. Rushing can lead to mistakes that could compromise the safety of your installation.

Can You Add A Light Fixture To Ceiling Fan Rings World The Local Business Directory For Small And Large Businesses

Ceiling Fan Light Kit Installation How To
Replacing A Ceiling Fan Light With Regular Fixture Jlc

Replacing A Ceiling Fan Light With Regular Fixture Jlc

How To Install A Light On Ceiling Fan 11 Steps

How To Safely Install A Ceiling Fan In Your Home White Electric Electricians North

How To Install A Light On Ceiling Fan 11 Steps
Ceiling Fan Light Fixture Replacement Ifixit Repair Guide

How To Create A Chandelier On Ceiling Fan Hometalk

How To Install A Light On Ceiling Fan 11 Steps


