Installing a Light Fixture in an Existing Ceiling: A Comprehensive Guide
Upgrading your home's lighting can significantly enhance its aesthetic appeal and ambiance. Installing a new light fixture in an existing ceiling is a relatively straightforward task that, with adequate preparation and safety precautions, can be completed by homeowners with basic DIY skills.
Essential Tools and Materials
Before embarking on the installation, ensure you have gathered the necessary tools and materials:
- New light fixture
- Screwdriver (Phillips and/or flathead)
- Wire strippers
- Electrical tape
- Safety glasses
- Ladder
- Circuit tester (optional but recommended)
Safety First
Electrical work poses potential hazards, so prioritize safety throughout the process:
- Turn off the power supply to the fixture's circuit at the circuit breaker panel before any work.
- Wear safety glasses to protect your eyes from debris.
- Test the circuit with a circuit tester to ensure it's truly de-energized.
Detaching the Existing Fixture
Once safety measures are in place, proceed to remove the existing fixture:
- Remove the fixture's cover or shade by unscrewing or releasing any retaining mechanisms.
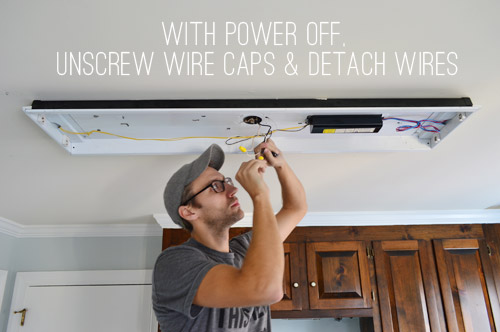
- Disconnect the electrical wires by loosening the terminal screws and carefully pulling them apart.
- Unscrew the mounting bolts or screws holding the fixture to the ceiling electrical box.
Preparing for the New Fixture
Before installing the new fixture, make essential preparations:
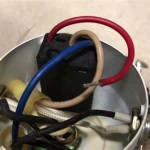
- Strip approximately half an inch of insulation from the ends of the electrical wires.
- Connect the bare wire ends to the соответствующие terminals on the new fixture using the provided wire nuts or screw terminals.
Mounting the New Fixture
Securely mount the new fixture to the ceiling electrical box:
- Test-fit the fixture to ensure it aligns with the electrical box holes.
- Apply electrical tape around the wire connections for added insulation.
- Thread the fixture wires through the center hole of the mounting bracket and connect them to the corresponding terminals in the electrical box.
- Secure the fixture to the mounting bracket using the provided screws or bolts.
Finishing Touches
Complete the installation process with these final steps:
- Install the light bulbs into the fixture's sockets.
- Reattach the fixture's cover or shade, securing it in place.
- Turn on the power at the circuit breaker panel and test the light fixture.
Additional Tips
- If replacing an old fixture with a newer one, ensure the new fixture's size and shape are compatible with the existing electrical box.
- For heavier fixtures, consider using toggle bolts or molly bolts for more secure mounting.
- If you encounter any electrical issues or have difficulty installing the fixture, do not hesitate to consult a licensed electrician.
- Always refer to the fixture manufacturer's instructions for specific installation guidelines.

How To Install Ceiling Light Homeserve Usa

How To Install Recessed Lighting Fixthisbuildthat

How To Install A Ceiling Light Fixture Diy Family Handyman

Adding Light How To Install A Fixture Diy

How To Install Led Recessed Lighting In Existing Ceiling Info

How To Replace Install A Light Fixture The Art Of Manliness

How To Replace An Old Fluorescent Light Fixture Young House Love

How To Install Pendant Lights Homeserve Usa

Replacing A Ceiling Fan Light With Regular Fixture Jlc

How To Install A Ceiling Light Fixture Diy Family Handyman
Related Posts


