How to Wire a Hunter Ceiling Fan and Light Control
Installing a Hunter ceiling fan and light control can be a daunting task, but with the right instructions, it can be completed safely and efficiently. Here is a step-by-step guide on how to wire a Hunter ceiling fan and light control:
1. Gather Your Tools and Materials
You will need the following tools and materials: * Phillips head screwdriver * Flat head screwdriver * Wire strippers * Electrical tape * Wire nuts * Ceiling fan mounting bracket * Hunter ceiling fan * Light control switch * Electrical wire2. Safety First
Before you begin any electrical work, it is important to turn off the power at the circuit breaker. This will prevent any electrical shocks.3. Install the Ceiling Fan Mounting Bracket
The first step is to install the ceiling fan mounting bracket. The mounting bracket should be mounted to the ceiling joist, using the provided screws. Make sure that the mounting bracket is level.4. Wire the Ceiling Fan
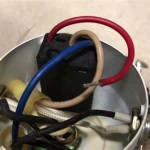
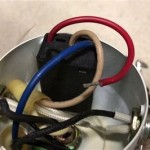
Next, you will need to wire the ceiling fan. The ceiling fan will have three wires: a black wire, a white wire, and a green wire. The black wire is the hot wire, the white wire is the neutral wire, and the green wire is the ground wire. Connect the black wire from the ceiling fan to the black wire from the ceiling. Connect the white wire from the ceiling fan to the white wire from the ceiling. Connect the green wire from the ceiling fan to the green wire from the ceiling.5. Install the Ceiling Fan
Once the ceiling fan is wired, you can install it on the mounting bracket. The ceiling fan will have a canopy that fits over the mounting bracket. Secure the canopy to the mounting bracket using the provided screws.6. Wire the Light Control Switch
The next step is to wire the light control switch. The light control switch will have two wires: a black wire and a white wire. The black wire is the hot wire, and the white wire is the neutral wire. Connect the black wire from the light control switch to the black wire from the ceiling. Connect the white wire from the light control switch to the white wire from the ceiling.7. Install the Light Control Switch
Once the light control switch is wired, you can install it on the wall. The light control switch will have a faceplate that fits over the switch. Secure the faceplate to the switch using the provided screws.8. Test the Ceiling Fan and Light Control
Once the ceiling fan and light control are installed, you can turn on the power at the circuit breaker. Test the ceiling fan to make sure that it is working properly. Test the light control switch to make sure that it is working properly.9. Enjoy Your New Ceiling Fan and Light Control
Your Hunter ceiling fan and light control are now installed and ready to use. Enjoy the涼爽的微風 and beautiful light that your new ceiling fan and light control provide.
Wiring A Ceiling Fan And Light With Diagrams Ptr

Bypass Hunter Fan Receiver Doityourself Com Community Forums

How To Wire A Ceiling Fan Control Using Dimmer Switch

How Do I Install New Hunter Ceiling Fan With Remote Control And Still Have Switch Wall For The Light Separately R Homemaintenance

Installation Instructions For Hunter Ceiling Fan

How To Connect Wiring For Ceiling Fan With Remote Receiver Connection Two Switches Manual Only Shows Method Single Switch R Askanelectrician
Wiring A Ceiling Fan With Two Switches

Installed Hunter Dimmer Switch But Having Issues With Lights Doityourself Com Community Forums

Fan Light Dual Slide Wall Control 27182 Hunter

Hunter Fans How To Install Your Ceiling Fan Cpo S
Related Posts


