How to Install a Ceiling Fan into a Light Fixture
Replacing a light fixture with a ceiling fan is a great way to add both style and function to any room. Ceiling fans provide air circulation, keeping you cool during hot months and helping to reduce heating costs in the winter. They also come in various styles, so you can find one that matches your décor.
Installing a ceiling fan is not a difficult project, but it does require some basic electrical knowledge. If you are not comfortable working with electricity, you should hire a qualified electrician to do the job. Installing a ceiling fan safely can help prevent electrical fires and other hazards.
Here are the steps on how to install a ceiling fan into a light fixture:
1. Gather your materials
- Ceiling fan
- Electrical wire
- Wire nuts
- Screwdriver
- Pliers
- Electrical tape
- Ladder
2. Turn off the power to the light fixture
Locate the circuit breaker or fuse box that controls the power to the light fixture. Turn off the power and double-check that the power is off by trying to turn on the light switch. If the light does not turn on, the power is off.
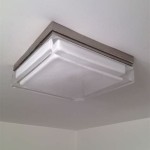
3. Remove the old light fixture
Use a screwdriver to remove the screws that hold the light fixture in place. Carefully lower the light fixture and disconnect the electrical wires. Cap the wires with wire nuts.
4. Mount the ceiling fan bracket
The ceiling fan bracket is the metal plate that will support the ceiling fan. Hold the bracket up to the ceiling and mark the location of the mounting holes. Drill pilot holes for the screws and then screw the bracket into place.
5. Connect the electrical wires
Connect the electrical wires from the ceiling fan to the electrical wires from the ceiling. Make sure to connect the black wire to the black wire, the white wire to the white wire, and the green wire to the ground wire.
6. Install the ceiling fan
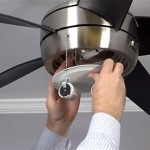
Hang the ceiling fan from the bracket and secure it with the screws that came with the fan. Make sure that the fan is level and tight.
7. Install the light kit (optional)
If your ceiling fan came with a light kit, install it now. Follow the manufacturer's instructions for installing the light kit.
8. Turn on the power
Turn on the power at the circuit breaker or fuse box. Test the ceiling fan to make sure it is working properly.
Installing a ceiling fan into a light fixture is a relatively simple project that can be completed in a few hours. By following these steps, you can safely install a ceiling fan and enjoy the benefits of improved air circulation and style in your home.
Replacing A Ceiling Fan Light With Regular Fixture Jlc
I Recently Installed A Ceiling Fan With Light Where There Was Formerly Just It Works Great But The Switch On Wall Doesn T Turn Off Why

5 Tips For Replacing A Light Fixture With Ceiling Fan Dig This Design

Ceiling Fan Wiring Diagram Power Into Light Dual Switch

How To Replace A Light Fixture With Ceiling Fan Projects By Peter

4 Ways To Replace A Light Bulb In Ceiling Fan Wikihow

How To Replace A Light Fixture With Ceiling Fan The Money Pit

How To Change Light For Ceiling Fan

How To Install A Ceiling Fan With Pictures Wikihow

How To Hook Up A Ceiling Fan Storables


