How to Hang a Ceiling Fan Light Fixture with Ease
Enhancing your living space with a ceiling fan light fixture is a rewarding home improvement project that offers both style and functionality. To ensure a safe and seamless installation, follow these essential steps:
1. Safety First
Before commencing any electrical work, ensure safety by turning off power at the breaker panel. Verify that the power is indeed off by using a non-contact voltage tester. Wear gloves and safety glasses to protect yourself further.
2. Assemble the Fan
Refer to the manufacturer's instructions for detailed assembly steps. Typically, this involves connecting the fan blades, motor housing, and light fixtures together. Ensure that all parts are securely fastened.
3. Mount the Bracket
Locate the electrical box on the ceiling and align the mounting bracket accordingly. Use the provided screws to secure the bracket firmly to the box, ensuring it is level and stable.
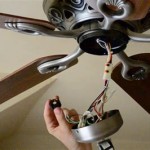
4. Connect the Wires
Inside the electrical box, you will find wires for power, ground, and neutral. Strip the ends of the fan's wires to expose the copper core and match them to the corresponding colors in the box.
Using wire nuts, connect the fan's wires to the appropriate wires in the electrical box. Twist the wires together clockwise and secure them with the wire nuts.
5. Hang the Fan
Carefully lift the fan assembly and align it with the mounting bracket. Connect the fan's electrical wires to the wires extending from the bracket. Position the fan securely onto the bracket and tighten the locknut to hold it in place.
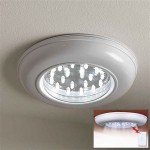
6. Install the Light Fixture
Attach the light fixture to the fan's motor housing by following the manufacturer's instructions. Ensure that it is firmly secured and that the light bulbs are properly installed.
7. Balance the Blades
To ensure smooth operation, the fan blades may need to be balanced. Check the manufacturer's instructions for specific balancing procedures.
8. Restore Power
Return to the breaker panel and restore power to the circuit. The ceiling fan light fixture should now be operational.
Additional Tips
- Consider using a ceiling fan rated for your room size to ensure adequate airflow.
- Position the fan at least 7 feet above the floor for optimal comfort.
- If the fan wobbles after installation, check the balance weights and make necessary adjustments.
- Regularly clean the fan blades to maintain airflow efficiency.
- For safety reasons, always consult an electrician if you encounter any electrical issues during installation.
By following these steps and precautions, you can successfully hang a ceiling fan light fixture and enjoy its benefits, adding both style and functionality to your home.

Replacing A Ceiling Fan Light With Regular Fixture Jlc

Replacing A Ceiling Fan Light With Regular Fixture Jlc

Wiring A Ceiling Fan And Light With Diagrams Ptr

How To Add A Light Kit Your Ceiling Fan Mr Electric

Ceiling Fan Light Kit Installation How To

Ceiling Fan Light Fixture Replacement Ifixit Repair Guide

How To Install A Ceiling Fan Light Kit Shockley Electric

How To Safely Install A Ceiling Fan In Your Home White Electric Electricians North

Ceiling Fan Light Kit Installation How To

Replace Light Fixture W Ceiling Fan R Askanelectrician
Related Posts