Hampton Bay Ceiling Fan Remote Installation Manual: A Comprehensive Guide
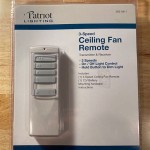
Installing a ceiling fan remote control can enhance the convenience and functionality of your ceiling fan. By following the instructions in the Hampton Bay Ceiling Fan Remote Installation Manual, you can successfully complete the installation process.
Before beginning the installation, ensure that you have all the necessary tools and components, including the remote control, receiver, and mounting hardware. Read through the manual thoroughly to familiarize yourself with the steps involved.
Step 1: Power Safety
Before starting any electrical work, turn off the power to the ceiling fan at the circuit breaker or fuse box. This crucial safety measure prevents electrical shocks or fires.
Step 2: Receiver Installation
Locate the receiver included with the remote control kit. Connect the wires from the ceiling fan to the corresponding terminals on the receiver. Typically, black wires connect to black terminals, white wires to white terminals, and green or bare copper wires to green or bare copper terminals.
Step 3: Mounting the Receiver
Identify a suitable location for mounting the receiver near the ceiling fan. Secure the receiver using the provided mounting hardware, ensuring it remains firmly in place.
Step 4: Remote Control Pairing
Turn on the power to the ceiling fan at the circuit breaker or fuse box. Within a few seconds, the remote control should automatically pair with the receiver. If not, refer to the manual for specific pairing instructions.
Step 5: Programming the Remote Control
Most Hampton Bay ceiling fan remote controls offer various programmable features. The manual provides detailed instructions on programming the remote to control the fan speed, light, and other customizable settings.
Step 6: Final Checks
Once the remote control is programmed, test its functionality by operating the fan and light. Ensure that the fan and light respond correctly to the commands sent by the remote control.
Safety Tips
- Always follow the manufacturer's instructions carefully.
- Turn off the power before starting any electrical work.
- Use proper insulation and electrical connectors.
- Do not overload the fan or remote control.
- If you have any doubts or encounter any difficulties, seek professional assistance from a licensed electrician.
By following these steps and adhering to the safety tips outlined in the Hampton Bay Ceiling Fan Remote Installation Manual, you can successfully install and enjoy the convenience of a remote-controlled ceiling fan.

Troubleshooting Your Remote Controls Step By Hampton Bay Ceiling Fans Lighting

Hampton Bay 70830 Instructions Assembly Manualzz

Hampton Bay 98139 3 Sd Universal Ceiling Fan Wireless Wall Control User Guide

Hampton Bay 98139 3 Sd Universal Ceiling Fan Wireless Wall Control User Guide

Hampton Bay 9050h Use And Care Manual Manualzz

Ceiling Fan Remote Control Replacement For Hampton Bay Uc7078t With Light Dimmer

Hampton Bay Thermostatic Remote Control User Guide

Fulenqnu Replacement Fan 9t With Reverse Key Thermostatic Remote Control For Hampton Bay Ceiling Fans Fan9t Fcc Id L3hfan9t Pn Fan9tr Works Receiver Fan10r 10r Com

Troubleshooting Your Remote Controls Step By Hampton Bay Ceiling Fans Lighting

Solved Remote Works Fine But The Fan Does Not No Light Fixya
Related Posts


