Installing LED Light Strips in Ceiling: A Comprehensive Guide
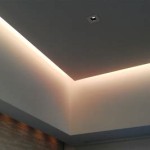
LED light strips have emerged as a versatile and energy-efficient lighting solution for a multitude of applications, including ceiling installations. Whether you seek ambient illumination, accent lighting, or a touch of decorative flair, LED light strips offer endless possibilities. This guide will provide you with a step-by-step process for seamlessly installing LED light strips in your ceiling, ensuring a professional and luminous result.
Planning and Preparation
Before embarking on the installation, it's crucial to carefully plan your layout and gather the necessary materials. Determine the desired location and length of the light strips, as well as any additional components such as controllers or power supplies. Ensure you have a suitable mounting surface, such as drywall or plaster, and the appropriate tools for cutting and connecting the light strips.
Installing the Light Strips
Begin by preparing the mounting surface by cleaning it and removing any dust or debris. Measure and cut the light strips to the desired lengths, ensuring that the cuts align with the designated solder points. Strip the insulation from the ends of the cut strips and solder the connecting wires according to the manufacturer's instructions.
Once the light strips are connected, position them on the ceiling surface and secure them using mounting clips or adhesive tape. Ensure that the light strips are aligned correctly and that the adhesive adheres firmly to the surface.
Connecting to Power
The next step is to connect the light strips to a power source. Typically, this involves connecting the strips to a compatible controller or power supply. Follow the manufacturer's instructions for wiring and polarity to ensure proper operation.
If your installation requires multiple light strips, you may need to use a junction box or additional wiring to connect them. Ensure that all electrical connections are secure and meet safety regulations.
Finishing Touches
To complete the installation, conceal any visible wires or connections using cable clips or channels. This will ensure a clean and professional appearance. For added convenience, consider installing a wireless controller or remote control to adjust the brightness, color, and other settings.
Tips for a Successful Installation
- Plan ahead: Measure and cut the light strips accurately to avoid any discrepancies.
- Prepare the surface: Clean the mounting surface to ensure proper adhesion.
- Secure connections: Solder and connect the light strips carefully to prevent any electrical issues.
- Test before installing: Turn on the light strips before securing them to ensure they work properly.
- Conceal wires: Use cable clips or channels to hide any visible wires.
Conclusion
Installing LED light strips in your ceiling is a rewarding project that can enhance the ambiance and functionality of your space. By following these steps and incorporating the tips provided, you can achieve a professional-looking installation that will illuminate your home for years to come.

6 Steps How To Install Led Strip Lights On Ceiling

How To Position Your Led Strip Lights

Installing Led Strip Lights In A Ceiling Future Light South
How To Install Beautiful Led Cove Lighting At Home

How To Install Led Strip Lights On The Ceiling Lighting Info

How To Cut Connect Install Led Light Strips Smart Lighting

How To Install Elegant Cove Lighting From Crown Molding

How To Install The Led Strip Light On Ceiling

How To Install Led Cove Lighting Super Bright Leds

How To Position Your Led Strip Lights
Related Posts


