How To Install Pot Lights In Insulated Ceiling
Pot lights are a great way to add style and functionality to your home. They can be used to highlight architectural features, create ambient light, or simply provide task lighting in a specific area. If you're thinking about installing pot lights in your home, there are a few things you need to know.
First, you need to determine what type of pot lights you want. There are two main types of pot lights: recessed and surface-mounted. Recessed pot lights are installed flush with the ceiling, while surface-mounted pot lights are installed on top of the ceiling. Recessed pot lights are more popular, as they provide a more finished look. However, surface-mounted pot lights are easier to install and can be used in areas where there is not enough space for recessed pot lights.
Once you've chosen the type of pot lights you want, you need to determine how many you need. The number of pot lights you need will depend on the size of the room and the desired level of lighting. As a general rule of thumb, you should install one pot light for every 50 square feet of space. However, you may need to install more pot lights if the room is particularly large or if you want a brighter level of lighting.
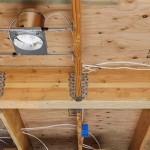
Once you've determined the type and number of pot lights you need, you can begin the installation process. The first step is to cut holes in the ceiling for the pot lights. The size of the holes will depend on the size of the pot lights. Once the holes are cut, you can insert the pot lights into the holes and secure them in place.
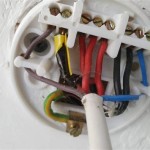
The next step is to connect the pot lights to the electrical wiring. The electrical wiring should be run through the attic or basement and connected to a junction box. The junction box should be located near the pot lights so that the wires can be easily connected. Once the wires are connected, you can turn on the power and test the pot lights to make sure they are working properly.
Installing pot lights in an insulated ceiling can be a bit more challenging than installing pot lights in an uninsulated ceiling. However, it is still a relatively simple process that can be completed in a few hours. By following these steps, you can install pot lights in your insulated ceiling and enjoy the benefits of beautiful and functional lighting.
Here Are Some Additional Tips For Installing Pot Lights In Insulated Ceiling:
- Always wear safety glasses when working with electrical wiring.
- Make sure the electrical wiring is properly rated for the pot lights you are installing.
- Use a flashlight to inspect the insulation around the pot lights to make sure there are no gaps or holes.
- If you are not comfortable working with electrical wiring, hire a qualified electrician to install the pot lights for you.

Recessed Lights Covered With Insulation Electrical Inspections Internachi Forum

Downlights And Recessed Lights Smarter Homes

How To Use Insulated Can Lights In Ceilings Diy
A Never Worry Again Insulated Ceiling Jlc
Vapour Barrier Around Recessed Lights Electrician Talk

How To Install Recessed Lighting Fixthisbuildthat

Can I Cover Downlights With Insulation

How To Seal Recessed Light Fixtures For Energy Efficiency Today S Homeowner

Install Recessed Lighting In Your Home Office

Air Sealing Recessed Light Fixtures Below Unconditioned Space Building America Solution Center
Related Posts


