Repairing Ceiling Light Socket: Essential Aspects
Ceiling light sockets are crucial components that provide a secure connection between light bulbs and the electrical system. However, over time, they can become loose, damaged, or malfunction, requiring repair. This article provides a comprehensive guide to essential aspects of repairing ceiling light sockets, ensuring safety and efficient lighting.
1. Safety Considerations
Before attempting any electrical work, it is imperative to follow safety precautions. Turn off the power supply at the main breaker panel to prevent electrical shocks. Use insulated tools to avoid contact with live wires, and wear gloves for protection.
2. Identifying the Problem
The first step involves identifying the root cause of the socket malfunction. Loose connections, damaged wires, or faulty components are common issues. Inspect the socket for visible signs of damage, such as burn marks or sparking. Additionally, use a multimeter to test for continuity and proper voltage.
3. Gathering Materials
Depending on the nature of the repair, you will need appropriate tools and materials. Essential items include insulated screwdrivers, a wire stripper, electrical tape, replacement socket, and any necessary hardware.
4. Disassembling the Fixture
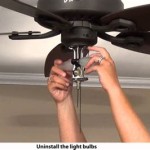
To access the light socket, disassemble the ceiling fixture carefully. Start by removing the decorative cover or diffuser, then unscrew the screws or bolts holding the fixture to the ceiling. Gently pull the fixture down, supporting it with one hand while disconnecting any wires.
5. Removing the Old Socket
Once the fixture is detached, locate the socket. It is typically held in place by screws or clips. Be cautious when disconnecting the wires from the socket's terminals. Use a screwdriver or pliers to twist the terminals counterclockwise to loosen them.
6. Installing the New Socket
Carefully align the replacement socket with the fixture. Secure it with screws or clips, and tighten them firmly. Reconnect the wires by twisting them clockwise onto the socket's terminals. Double-check the connections to ensure a snug fit.
7. Reassembly and Testing
Reassemble the fixture by following the reverse steps of disassembly. Tuck any excess wires neatly into the fixture, and secure the cover or diffuser. Restore power and test the light socket by turning it on. If the light illuminates, the repair is successful.
8. Troubleshooting
In case of persistent issues, check the following: Ensure the power supply is turned on, inspect connections for loose wires, and verify the compatibility of the replacement socket with the fixture. If troubleshooting does not resolve the problem, consult an electrician for further assistance.
Conclusion
Repairing a ceiling light socket is a manageable task with proper safety measures and attention to detail. By following the essential aspects outlined in this article, homeowners can restore proper lighting, maintain electrical safety, and enjoy a well-functioning ceiling light fixture.

Repair A Light Fixture Diy Family Handyman

Solving 5 Common Light Fixture Problems

How To Fix A Lamp Socket 8 Steps Replacing The Safety Lamps Repair Medium

How To Replace A Light Fixture Planitdiy

How To Replace Install A Light Fixture The Art Of Manliness

How To Replace Install A Light Fixture The Art Of Manliness

The Pull Chain On My Ceiling Light Pulled Free Entirely From Inside Base Is This Fixable R Howto

Why Won T My Lights Turn On How To Repair A Light Fixture At Batteries Plus

How To Replace Install A Light Fixture The Art Of Manliness
Related Posts


