How to Install a Harbor Breeze Ceiling Fan with Light Kit
Installing a ceiling fan with light kit can seem like a daunting task, but with the right tools and a step-by-step guide, you can complete the project with ease. Here's a comprehensive guide on how to install a Harbor Breeze ceiling fan with light kit: ### Tools and Materials Needed: - Phillips head screwdriver - Flat head screwdriver - Electrical tape - Wire nuts - Ladder - Safety glasses ### Safety Precautions: - Always turn off the power at the breaker box before starting any electrical work. - Wear safety glasses to protect your eyes from debris. - Work on a stable ladder and use caution when working at heights. ### Step-by-Step Installation Guide:1. Mount the Ceiling Fan Bracket:
- Remove the existing ceiling fan or light fixture (if any). - Attach the ceiling fan bracket to the electrical box using the provided screws. Ensure it is securely fastened.2. Wire the Ceiling Fan:
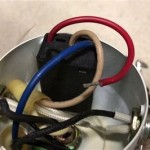
- Connect the black wire from the ceiling fan to the black wire from the electrical box. - Connect the white wire from the ceiling fan to the white wire from the electrical box. - Connect the ground wire (usually green or bare) from the ceiling fan to the ground wire from the electrical box. Secure all connections with wire nuts.3. Hang the Ceiling Fan:
- Lift the ceiling fan onto the ceiling fan bracket and align it. - Insert the locking pin through the bracket hole and twist it clockwise to secure the fan.4. Install the Light Kit:
- Remove the screws holding the canopy to the motor housing. - Connect the light kit wires to the ceiling fan wires using wire nuts. - Align the light kit with the motor housing and secure it with screws.5. Install the Light Bulbs:
- Insert the light bulbs into the sockets in the light kit. - Tighten the light bulbs securely by turning them clockwise.6. Install the Fan Blades:
- Insert the fan blades into the slots on the motor housing. - Secure the fan blades with screws provided in the kit.7. Install the Canopy:
- Place the canopy over the motor housing and align it with the screws. - Tighten the screws to secure the canopy.8. Turn on the Power and Test:
- Turn on the power at the breaker box. - Use the remote control or wall switch to turn on the fan and light. - Ensure that both the fan and light are functioning correctly. ### Tips and Troubleshooting: - If the fan doesn't turn on, check the electrical connections and ensure they are secure. - If the light doesn't turn on, check the light bulbs and ensure they are installed correctly. - If the fan wobbles, adjust the blade balance weights provided in the kit to reduce vibrations. - If you encounter any difficulties, refer to the manufacturer's instructions or consult a qualified electrician. By following these steps carefully, you can successfully install a Harbor Breeze ceiling fan with light kit and enjoy the benefits of improved air circulation and enhanced lighting.
Harbor Breeze Fan Installation Instructions Easy Steps Hampton Bay Ceiling Fans Lighting

How To Add A Light Kit Your Ceiling Fan Mr Electric

Harbor Breeze Crestwell 52 In Broe Color Changing Indoor Flush Mount Ceiling Fan With Light Remote 5 Blade The Fans Department At Com

How To Install A Hampton Bay Ceiling Fan Light Kit Fans Lighting

Harbor Breeze Armitage 52 Led Flush Mount Ceiling Fan W Light Kit New Com

Harbor Breeze Light Kit Not Working How To Fix Hampton Bay Ceiling Fans Lighting

Harbor Breeze Mz44bnk3lr Mazon Ceiling Fan Instruction Manual

Harbor Breeze 52 In Broe Waveport Ceiling Fan With Light Kit 5 Blade C Wk52nwz5l Rona

Harbor Breeze 4 Light White Incandescent Ceiling Fan Kit At Com

Home Decorators Collection Palm Cove 52 In Indoor Outdoor Led Natural Iron Ceiling Fan With Light Kit Downrod And Reversible Motor 51422 The Depot
Related Posts


