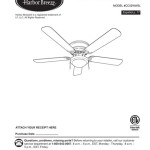
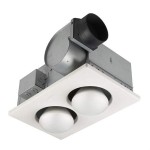
Nutone Ceiling Fan Light Wiring: A Comprehensive Guide
Installing a Nutone ceiling fan with light is a relatively straightforward task that can be easily accomplished with the right tools and materials. However, it's essential to ensure that the wiring is done correctly to avoid any electrical hazards. This guide will provide you with a detailed overview of the wiring process, ensuring a safe and successful installation.
Materials Required:
- Nutone ceiling fan
- Electrical wire
- Wire nuts
- Screwdriver
- Electrical tape
Safety Precautions:
- Turn off the power to the room at the breaker panel before starting any electrical work.
- Identify the wires in your ceiling using a non-contact voltage tester.
- Wear safety glasses and gloves to protect yourself from potential electrical hazards.
Wiring Steps:
- Identify the Wires: Identify the black (hot) wire, white (neutral) wire, and green or bare copper (ground) wire in your ceiling.
- Connect the Ground Wire: Twist the green or bare copper wire from the ceiling with the green or bare copper wire from the fan. Secure the connection with a wire nut.
- Connect the Neutral Wire: Twist together the white wire from the ceiling and the white wire from the fan. Secure the connection with a wire nut.
- Connect the Hot Wire: Twist together the black wire from the ceiling and the black wire from the fan. Optionally, you can also connect the blue wire from the fan (light wire) to the black wire from the fan to allow for independent light control. Secure all connections with a wire nut.
- Wrap with Electrical Tape: Wrap electrical tape around each wire connection to insulate and protect them.
Connecting the Light Kit:
- Install the Light Fixture: Attach the light fixture to the fan's motor housing according to the manufacturer's instructions.
- Connect the Light Wires: Identify the wires from the light kit (usually black, white, and ground). Connect the black wire to the black wire from the fan, the white wire to the white wire from the fan, and the ground wire to the green or bare copper wire from the fan.
- Secure the Connections: Secure all connections with wire nuts and wrap them with electrical tape for insulation.
Testing the Fan:
- Turn on the Power: Restore power to the room at the breaker panel.
- Test the Fan: Turn on the fan and light to ensure that they are working properly.
- Check for Loose Wires: Check all wire connections to ensure that they are tight and secure.
Troubleshooting:
If you encounter any issues with your Nutone ceiling fan light, try the following troubleshooting tips:- Verify Power: Ensure that the power is turned on at the breaker panel and that the switch controlling the fan is in the "on" position.
- Check Wire Connections: Inspect all wire connections to ensure that they are tight and secure. Loose connections can cause intermittent operation or complete failure.
- Replace Light Bulbs: If the light is not working, try replacing the light bulbs with new ones.
- Contact an Electrician: If you are unable to resolve the issue, contact a qualified electrician for assistance.
Conclusion:
Wiring a Nutone ceiling fan light can be a straightforward task with the proper preparation and safety precautions. By carefully following the steps outlined in this guide, you can ensure a safe and successful installation that will provide years of comfort and convenience in your home.
Bathroom Exhaust Fan Fluorescent Light Combination Nutone

Broan Nutone Ar80lwh Roomside Series Decorative Fan Light Instruction Manual

How To Wire A Nutone 668rp Exhaust Fan With Two Wall Switches Lead Has Four Wires Where Do I Put The Black

How To Add Exhaust Fan Heater Light Fixture Combination

Ventilation Fan With Light Nutone

Broan Nutone 9093wh Heater Exhaust Vent Fan Instruction Manual

Bathroom Fan Light Combination Model 667rn Nutone

Nutone Fan Light Night Wiring Doityourself Com Community Forums
Wiring New Bath Fan Combo With Motion Sensor Switch Diy Home Improvement Forum

Wiring A Combination Heater Fan And Light To Two Existing Switches R Askelectricians
Related Posts


