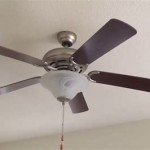
How to Remove a Ceiling Light Fan: A Step-by-Step Guide
Ceiling light fans are a great way to add both style and functionality to any room. However, there may come a time when you need to remove a ceiling light fan, whether it's for repairs, replacement, or a simple redesign.
While removing a ceiling light fan may seem like a daunting task, it's actually quite straightforward with the right tools and a little know-how. Here's a step-by-step guide to help you safely and efficiently remove a ceiling light fan:
Step 1: Gather Your Tools
Before you begin, gather the following tools:
- Phillips head screwdriver
- Flat head screwdriver
- Voltage tester
- Flashlight or headlamp
- Step ladder or stool
- Electrical tape
Step 2: Turn Off Power
Safety first! Before attempting to remove the ceiling light fan, turn off the power to the circuit that powers it. Use a voltage tester to confirm that the power is off before proceeding.
Step 3: Remove the Fan Blades
Most ceiling light fans have removable blades. Use a screwdriver to remove the screws that secure the blades to the fan. Carefully detach the blades and set them aside in a safe place.
Step 4: Remove the Light Fixture
Next, you need to remove the light fixture. First, disconnect the wires that connect the light fixture to the fan. Use wire nuts to cap off the wires. Then, unscrew the screws that hold the light fixture in place and carefully remove it.
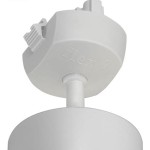
Step 5: Remove the Canopy
The canopy is the decorative cover that hides the electrical connections at the top of the fan. Use a screwdriver to remove the screws that hold the canopy in place. Carefully lower the canopy and disconnect any wires that are connected to it.
Step 6: Disconnect the Wiring
Now it's time to disconnect the wiring that connects the fan to the ceiling. Use wire nuts to cap off all the wires. Be careful not to touch any exposed wires. Once the wiring is disconnected, you can remove the fan from the ceiling.
Step 7: Remove the Mounting Bracket
Finally, you need to remove the mounting bracket that is attached to the ceiling. Use a screwdriver to remove the screws that hold the bracket in place. Once the screws are removed, you can carefully remove the bracket from the ceiling.
Congratulations!
You have now successfully removed the ceiling light fan. Be sure to store all the components in a safe place until you're ready to reinstall them or dispose of them properly.

4 Ways To Replace A Light Bulb In Ceiling Fan Wikihow

How To Remove A Ceiling Fan The Home Depot

How To Remove A Ceiling Fan Boggs Inspection Services

How To Remove A Ceiling Fan Hunter

How To Remove A Ceiling Fan The Home Depot

How To Remove A Ceiling Fan Homeserve Usa

How To Remove A Ceiling Fan The Home Depot

How To Remove A Ceiling Fan Hunter

4 Ways To Replace A Light Bulb In Ceiling Fan Wikihow

How To Remove A Ceiling Fan Hunter
Related Posts