How to Remove Ceiling Fan Lights: A Step-by-Step Guide
Ceiling fan lights can illuminate a room, provide air circulation, and add a touch of style to your decor. However, when it comes time to remove them for maintenance or replacement, the task may seem daunting. Here's a step-by-step guide to safely and effectively remove your ceiling fan lights:
1. Safety First
Before you begin, ensure your safety by turning off the power at the circuit breaker or fuse box. Verify that the power is off by attempting to turn on the fan. If the fan doesn't operate, you can proceed.
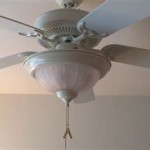
2. Remove the Globe or Lens
Locate the globe or lens that covers the light bulb. Gently twist or pull it to detach it from the fan.
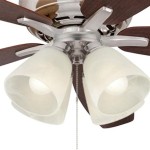
3. Remove the Light Bulbs
Once the globe or lens is removed, you'll see the light bulbs connected to the fan. Carefully unscrew the bulbs and remove them.
4. Disconnect the Light Wires
Each light socket will have two wires connected: one black and one white. Using electrical tape, carefully cap the black and white wires together. This will prevent any electrical current from flowing when you remove the wires.
5. Remove the Wire Nuts
Locate the wire nuts that connect the light wires to the fan's electrical system. Twist them in the opposite direction to loosen them and then remove them.
6. Detach the Light Fixture
Find the small screws that hold the light fixture in place. Remove them using a screwdriver. Now, gently pull the light fixture away from the fan.
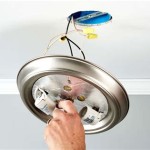
7. Disconnect the Electrical Wires
The light fixture will have a set of wires (typically black, white, and green) that connect to the fan's wiring. Disconnect these wires by loosening the screws that hold them together.
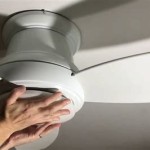
8. Remove the Mounting Bracket
The light fixture may be attached to a mounting bracket on the fan. If present, remove the screws that hold it in place and carefully detach the bracket.
9. Clean and Inspect
Once the light fixture is removed, take the opportunity to clean any dirt or debris around the light fixture area. Inspect the wires for any damage or fraying.
10. Replace or Repair
If you're replacing the light fixture, connect the new fixture to the fan's wiring according to the manufacturer's instructions. If you're repairing the old fixture, fix any issues before reinstalling it.
11. Reassemble the Light Fixture
Follow the steps in reverse order to reassemble the light fixture. Secure the mounting bracket, connect the electrical wires, and reinstall the light fixture. Don't forget to screw in the light bulbs and put back the globe or lens.
12. Restore Power
Once everything is back in place, restore power to the circuit breaker or fuse box. Test the fan and light to ensure they are working properly.

How To Remove A Ceiling Fan Krueger Electric

How To Remove A Ceiling Fan Temecula Handyman

How To Remove A Ceiling Fan Homeserve Usa

Ceiling Fan Light Fixture Replacement Ifixit Repair Guide

4 Ways To Replace A Light Bulb In Ceiling Fan Wikihow

Replacing A Ceiling Fan Light With Regular Fixture Jlc

Simple Tips To Help Remove A Stuck Glass Ceiling Fan Light Cover

How To Replace A Ceiling Fan Part I Makely

Removing Light Kit From Ceiling Fan Tiktok Search

How To Remove A Ceiling Fan Like Pro
Related Posts