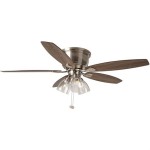
How to Install a Ceiling Fan Fixture
A ceiling fan is a great way to add style and comfort to any room. It can help circulate air, which can make a room feel cooler in the summer and warmer in the winter. Plus, ceiling fans can be a beautiful addition to your décor. If you're thinking about installing a ceiling fan, there are a few things you should keep in mind.
Safety First
Before you start any electrical work, it's important to turn off the power at the circuit breaker or fuse box. This will help prevent you from getting shocked. You should also wear safety glasses and gloves to protect yourself from any debris.
Gather Your Tools and Materials
To install a ceiling fan, you will need the following tools and materials:
- Ceiling fan
- Screwdriver
- Drill
- Wire nuts
- Electrical tape
- Ceiling fan mounting bracket
- Screws
- Safety glasses
- Gloves
Step 1: Install the Mounting Bracket
The first step is to install the ceiling fan mounting bracket. This bracket will support the weight of the fan. To install the bracket, follow these steps:
- Locate the center of the ceiling joist. You can do this by measuring the distance between the joists and dividing by two.
- Mark the location of the mounting bracket on the ceiling.
- Drill a pilot hole for the screws.
- Screw the mounting bracket into the ceiling joist.
Step 2: Wire the Fan
Once the mounting bracket is installed, you can wire the fan. To do this, follow these steps:
- Connect the black wire from the fan to the black wire from the ceiling.
- Connect the white wire from the fan to the white wire from the ceiling.
- Connect the green wire from the fan to the ground wire from the ceiling.
- Secure the wire connections with wire nuts.
- Wrap the wire connections with electrical tape.
Step 3: Mount the Fan
Once the fan is wired, you can mount it to the ceiling. To do this, follow these steps:
- Lift the fan onto the mounting bracket.
- Secure the fan to the bracket with the screws provided.
- Tighten the screws until the fan is secure.
Step 4: Install the Blades
Once the fan is mounted, you can install the blades. To do this, follow these steps:
- Insert the blades into the slots on the fan motor.
- Secure the blades with the screws provided.
- Tighten the screws until the blades are secure.
Step 5: Turn on the Power
Once the fan is installed, you can turn on the power at the circuit breaker or fuse box. The fan should start running immediately.
Troubleshooting
If the fan does not start running, there may be a problem with the installation. Check the following:
- Make sure that the power is turned on.
- Check the wire connections to make sure that they are secure.
- Make sure that the fan blades are properly installed.
If you are still having problems, you may need to call an electrician for help.
Conclusion
Installing a ceiling fan is a relatively easy project that can be completed in a few hours. By following the steps outlined in this guide, you can safely and easily install a ceiling fan in your home.

Replacing A Ceiling Fan Light With Regular Fixture Jlc
Replacing A Ceiling Fan Light With Regular Fixture Jlc

4 Ways To Replace A Light Bulb In Ceiling Fan Wikihow

How To Add A Light Kit Your Ceiling Fan Mr Electric

How To Safely Install A Ceiling Fan In Your Home White Electric Electricians North

How To Wire A Ceiling Fan Temecula Handyman

How To Replace A Ceiling Fan With Pendant Light

Wiring A Ceiling Fan And Light With Diagrams Ptr

How To Install A Ceiling Fan True Value

How To Install A Ceiling Fan Light Kit Shockley Electric
Related Posts


