Essential Aspects of Installing a Ceiling Fan with Light Assembly
Improving the comfort and aesthetics of a room often involves installing a ceiling fan with light assembly. Understanding the essential aspects of this task is crucial to ensure safety and effectiveness. This article explores the key considerations and steps involved in properly installing a ceiling fan with light assembly.
### Safety PrecautionsPrioritizing safety is paramount when installing a ceiling fan. Turn off the power supply at the circuit breaker panel before commencing any work. Ensure the support structure, such as the ceiling joists, is strong enough to bear the weight of the fan and light.
### Materials and ToolsGather the necessary materials and tools before starting the installation. Essential items include the ceiling fan with light assembly, mounting bracket, electrical wires, wire connectors, a screwdriver, and an electrical tester.
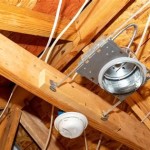
### Mounting the BracketThe mounting bracket provides a secure base for the fan. Locate the electrical box on the ceiling and attach the bracket using the provided screws. Ensure the bracket is level and securely fastened.
### Wiring the FanConnect the wires from the fan to the corresponding wires in the electrical box. Typically, black wires are used for power, white wires for neutral, and green or bare copper wires for grounding. ### Installing the Fan
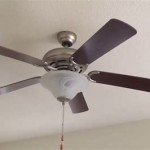
Lift the fan into place and align it with the mounting bracket. Secure the fan with the provided screws or bolts. Check that the fan is stable and free of any movement.
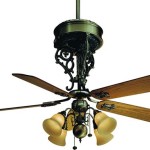
### Assembling the Light FixtureAttach the light fixture to the fan according to the manufacturer's instructions. Ensure the light bulbs are securely installed and facing the desired direction.
### Testing and FinishingTurn on the power supply and test the fan and light. Adjust the speed and fan direction as needed. If everything is working correctly, the installation is complete.
### TipsFor optimal performance, consider the fan's size and room dimensions. Ensure the fan is positioned at a sufficient height above furniture and other obstacles. Use a dimmer switch to control the light intensity and create the desired ambiance.
### ConclusionInstalling a ceiling fan with light assembly involves careful consideration of safety, materials, wiring, and assembly steps. By following these essential aspects, you can enhance the comfort and aesthetics of your space while ensuring a safe and functional installation.

Hunterexpress Easy Installation Ceiling Fan Hunter

How To Install A Ceiling Fan Brennan Electric In Seattle Wa

Ceiling Fan Light Kit Installation How To

Wiring A Ceiling Fan And Light With Diagrams Ptr

Basic Installation Guide For Ceiling Fans Mymac Com

4 Ways To Replace A Light Bulb In Ceiling Fan Wikihow

4 Ways To Replace A Light Bulb In Ceiling Fan Wikihow

Ceiling Fan Light Kit Installation How To

How To Install A Ceiling Fan Electrician Perth Electrical Services

Lighting Ceiling Fan Installation From Lowe S
Related Posts