Connecting Ceiling Light To Switch
When it comes to home improvement projects, installing a ceiling light can seem like a daunting task. However, with the right tools and a little bit of know-how, it's a project that can be easily completed in a few hours. One of the most important aspects of installing a ceiling light is connecting it to the switch. This will allow you to turn the light on and off from the convenience of the wall.
Tools and Materials You'll Need
Before you begin, gather the following tools and materials:
- Ceiling light fixture
- Electrical switch
- Wire strippers
- Screwdriver
- Electrical tape
Step-by-Step Instructions
Follow these step-by-step instructions to connect your ceiling light to the switch:
1. Turn off the power
Before you begin any electrical work, it's important to turn off the power to the circuit that you'll be working on. To do this, locate the circuit breaker panel and flip the breaker to the "off" position.
2. Remove the old light fixture
Next, remove the old light fixture by unscrewing the screws that hold it in place. Be careful not to drop the fixture, as it could break.
3. Prepare the wires
Once the old light fixture is removed, you'll need to prepare the wires for connection. Use the wire strippers to remove about 1/2 inch of insulation from the end of each wire.
4. Connect the wires
There are two types of wires that you'll need to connect: the hot wire and the neutral wire. The hot wire is typically black or red, and the neutral wire is typically white.
To connect the wires, twist the ends of the wires together clockwise. Once the wires are twisted together, wrap them with electrical tape to secure the connection.
5. Install the new light fixture
Once the wires are connected, you can install the new light fixture. To do this, simply screw the fixture into place.
6. Turn on the power
Once the light fixture is installed, turn on the power to the circuit and test the light to make sure it's working properly.
Tips for Connecting Ceiling Light To Switch
Here are a few tips to help you connect your ceiling light to the switch:
- If you're not sure which wire is the hot wire and which wire is the neutral wire, you can use a voltage tester to determine which wire is which.
- When twisting the wires together, make sure that you twist them clockwise. This will help to prevent the wires from coming loose.
- Wrap the electrical tape around the wires tightly to secure the connection.
- If you're not comfortable working with electricity, it's best to hire a licensed electrician to install your ceiling light.

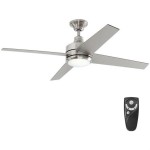
How To Wire A Ceiling Fan Light Switch Quora

Wiring A Ceiling Fan And Light With Diagrams Ptr

Wiring A Ceiling Fan And Light With Diagrams Ptr

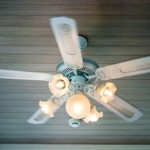
Replacing A Ceiling Fan Light With Regular Fixture Jlc

How To Install A One Way Light Switch Socketsandswitches Com

Wiring A Ceiling Fan And Light With Diagrams Ptr

Wiring A Ceiling Fan And Light With Diagrams Ptr

Light Switch Wiring Diagrams Do It Yourself Help Com

Need Feedback On Wiring Fan And Switch With Smartswitches Projects Stories Smartthings Community

Inside The Circuit Pendant Lighting Light Switch Wiring Homeowner Faqs
Related Posts