How To Wire Can Lights In A Finished Ceiling
Adding can lights to a finished ceiling can be a great way to improve the lighting in your home. However, it can also be a challenging task, especially if you're not familiar with electrical work. That's why it's important to follow these steps carefully and to take all necessary safety precautions.
### Step 1: Gather Your MaterialsBefore you begin, you'll need to gather the following materials:
- Can lights
- Electrical wire
- Junction box
- Drill
- Screwdriver
- Wire cutters
- Electrical tape
Once you have your materials, you'll need to choose a location for your can lights. The best place to put can lights is in the center of the room, where they can provide the most light. However, you can also place them in other locations, such as over a kitchen island or in a hallway.
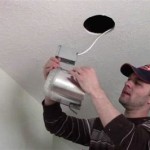
### Step 3: Cut a Hole for the Can LightOnce you've chosen a location for your can lights, you'll need to cut a hole for them. The size of the hole will depend on the size of the can light. Use a drill to cut a hole that is slightly smaller than the can light.
### Step 4: Install the Junction BoxNext, you'll need to install a junction box. The junction box will house the electrical wires that connect the can lights to the power source. To install the junction box, use a screwdriver to attach it to the ceiling. Make sure that the junction box is level and secure.
### Step 5: Run the Electrical WireNow, you'll need to run the electrical wire from the junction box to the can lights. Use wire cutters to cut the wire to the appropriate length. Then, strip the ends of the wire and connect them to the terminals on the can lights. Make sure that the connections are tight and secure.
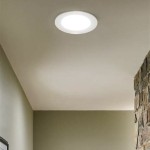
### Step 6: Install the Can LightsOnce the electrical wire is connected, you can install the can lights. To install a can light, simply insert it into the hole that you cut in the ceiling. Then, twist the can light until it is secure. Make sure that the can light is level and that it is not recessed too far into the ceiling.
### Step 7: Turn on the PowerOnce all of the can lights are installed, you can turn on the power. To do this, simply flip the switch that controls the circuit that the can lights are connected to. If the can lights do not turn on, check the connections to make sure that they are tight and secure.
### Tips for Wiring Can Lights in a Finished CeilingHere are a few tips for wiring can lights in a finished ceiling:
- Always turn off the power before you begin working on any electrical wiring.
- Use a drill bit that is slightly smaller than the can light to cut the hole in the ceiling.
- Make sure that the junction box is level and secure before you connect the electrical wire.
- Tighten all of the connections to make sure that they are secure.
- Turn on the power to test the can lights before you finish the installation.
Wiring can lights in a finished ceiling can be a challenging task, but it is possible to do it yourself with a little care and planning. By following these steps, you can safely and easily install can lights in your home.

How To Install Recessed Lighting Fixthisbuildthat

Installing Recessed Lighting Fine Homebuilding

How To Wire Recessed Lighting Tabletop Walk Through

How To Wire Recessed Lighting Tabletop Walk Through

How To Install New Work Recessed Lighting

8 Recessed Lighting Installation Tips For Diyers Bob Vila

How To Install Recessed Lighting Fixthisbuildthat

Replacing A Ceiling Fan Light With Regular Fixture Jlc

How To Build A Soffit Box With Recessed Lighting Diy

How To Install Recessed Lighting Fixthisbuildthat
Related Posts