How to Effortlessly Install a Flush Mount Ceiling Light
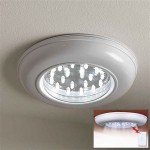
Transform the ambiance of your living space by installing a flush mount ceiling light. This practical and stylish lighting solution seamlessly integrates into your ceiling, providing ample illumination without overwhelming your decor. Here's a comprehensive guide to help you achieve a flawless installation:
1. Gather Your Tools and Materials
Before embarking on this project, ensure you have the necessary tools and materials at your disposal:
- Flush mount ceiling light
- Mounting bracket
- Screwdriver
- Wire strippers
- Electrical tape
- Safety glasses
2. Safety First: Turn Off Power
Electrical work poses potential hazards, so always prioritize safety. Turn off the power to the circuit where you plan to install the light fixture. Verify that the power is off using a voltage tester before proceeding.
3. Remove the Old Fixture (if Applicable)
If an existing ceiling light is present, gently remove it by unscrewing the mounting bracket and disconnecting the wires. Secure the wires out of the way to prevent accidental contact.
4. Mount the Bracket
Attach the mounting bracket to the ceiling electrical box using the provided screws. Ensure the bracket is securely fastened and aligns properly with the knockout holes.
5. Connect the Wires
Connect the wires from the fixture to the wires in the electrical box as follows: black to black, white to white, and green or bare copper ground wire to the ground screw on the mounting bracket. Ensure all connections are tight and properly insulated with electrical tape.
6. Secure the Fixture
Lift the light fixture onto the mounting bracket and align the screws. Tighten the screws until the fixture is securely attached to the ceiling.
7. Install the Diffuser or Lens
Most flush mount ceiling lights require a diffuser or lens to disperse the light evenly. Carefully attach this component according to the manufacturer's instructions.
8. Turn on the Power and Test
Once the light fixture is fully installed, restore power to the circuit. Turn on the light to ensure it functions correctly and provides adequate illumination.
Additional Tips:
- Choose a flush mount ceiling light that complements your ceiling height and room size.
- If you're not comfortable working with electricity, consider hiring a qualified electrician.
- Use a ladder with a sturdy platform for added stability while working.
- Keep all electrical connections dry and protected.
- Periodically inspect the light fixture for any signs of damage or loose connections.

Light Fixture Flush Mount Installation Wattco Electric

16w Led Flush Mount Ceiling Light Dimmable 10 5 Inch Brushed Nickel White Lepro

The Ultimate Flush Ceiling Light Installation And Guide 21 22 Fancy Place

15w Led Recessed Mount Ceiling Lights 5000k Daylight White Waterproof 1250lm Le

How To Install A Semi Flush Mount Ceiling Light

Flush Mount Ceiling Lights Waterproof Led Le

Led Flush Mount Ceiling Light Fixture 12 Inch 24w 3200lm 4000k Neutr Freeamzs

Commercial Electric 13 In Adjust Color Temp Led Flush Mount Ceiling Light W Night Optional White Oil Rubbed Broe Trim 10 Pack 56584192 10pk The Home Depot

Commercial Electric 13 In White Oil Rubbed Broe Trims 1350 Lumens Led Flush Mount Ceiling Light Fixture With Night Adjustable Cct 56584112 The Home Depot

In Focus Flush And Semi Mounted Lights 1000bulbs Blog
Related Posts

