Harbor Breeze Pawtucket Ceiling Fan Installation Instructions: A Comprehensive Guide
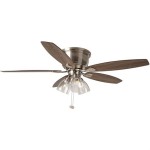
Enhance the comfort and ambiance of your living space with the Harbor Breeze Pawtucket ceiling fan. Its sleek design and efficient airflow complement both modern and traditional interiors. To ensure proper installation and optimal performance, follow these instructions carefully. By meticulously following each step, you can enjoy a flawlessly functioning ceiling fan that will provide years of comfort and style.
Pre-Installation Considerations:
Before embarking on the installation process, it is crucial to ensure that you have gathered all the necessary tools and materials. Refer to the enclosed list to verify that you have everything you need. Additionally, ensure that the ceiling you intend to install the fan on is capable of supporting its weight and that there are no hidden electrical wires or pipes in the chosen location.
Step-by-Step Installation Guide:
1. Mount the Ceiling Bracket:
- Locate the electrical box on the ceiling and secure the ceiling bracket to it using the provided screws.
- Ensure that the bracket is flush against the ceiling and that the wires are neatly tucked inside.
2. Assemble the Downrod:
- Connect the downrod sections together and secure them tightly using the provided screws.
- Slide the downrod assembly onto the ceiling bracket and secure it with the included pin and clip.
3. Attach the Fan Motor:
- Lift the fan motor carefully and align it with the downrod assembly.
- Secure the motor to the downrod using the provided screws.
4. Wire the Electrical Connections:
- Connect the black wire from the ceiling to the black wire from the fan.
- Connect the white wire from the ceiling to the white wire from the fan.
- Connect the green (or bare copper) ground wire from the ceiling to the green (or bare copper) ground wire from the fan.
- Secure all connections with the provided wire nuts.
- Tuck the wires neatly into the ceiling bracket.
5. Install the Canopy:
- Slide the canopy up the downrod and secure it to the ceiling bracket.
- Ensure that the canopy is flush against the ceiling.
6. Attach the Blades:
- Insert the blades into the blade holders on the motor.
- Secure the blades with the provided screws.
- Ensure that all blades are securely fastened.
7. Install the Light Kit (Optional):
- If your fan includes a light kit, attach it to the motor according to the manufacturer's instructions.
- Insert the bulbs into the sockets and secure the glass shade.
Final Checks:
- Turn on the power and check if the fan is operating correctly.
- If the fan is wobbling, use the provided balancing kit to correct the imbalance.
- Enjoy the improved comfort and ambiance provided by your newly installed Harbor Breeze Pawtucket ceiling fan.

Harbor Breeze 40959 Installation Manual Manualslib

Harbor Breeze Pawtucket 52 In Oil Rubbed Broe Led Indoor Flush Mount Ceiling Fan With Light Remote 5 Blade At Com

Harbor Breeze Pawtucket 52 In Oil Rubbed Broe Led Indoor Flush Mount Ceiling Fan With Light Remote 5 Blade At Com

Harbor Breeze 40680 Manual Manualslib

Harbor Breeze Pawtucket 52 In Brushed Nickel Led Indoor Flush Mount Ceiling Fan With Light Remote 5 Blade At Com

Why You Should Read Ceiling Fan Manuals Best Fans

Harbor Breeze Replacement Parts Ceiling Fans Remotes More Hampton Bay Lighting

Harbor Breeze 40678 Instruction Manual Manualslib

Harbor Breeze Pawtucket 52 In Oil Rubbed Broe Led Indoor Flush Mount Ceiling Fan With Light Remote 5 Blade At Com

This Ceiling Fan Makes Installation Easy
Related Posts


