Essential Aspects of Dropped Ceiling Light Box Installation
Dropped ceiling light boxes offer a versatile and efficient way to enhance the lighting in your space. Whether you're aiming for ambient illumination or focused task lighting, these light boxes can elevate any environment. Mastering the installation process is crucial to ensure optimal performance and longevity.
Planning and Preparation: Before embarking on the installation, carefully plan the layout and determine the number of light boxes required. Measure the ceiling space and mark the desired locations for the fixtures. Gather the necessary tools, including a screwdriver, drill, wire strippers, and safety gear.
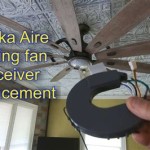
Wiring and Electrical Considerations: Ensure that the ceiling is wired appropriately for the light box installation. Connect the wiring harness of the light box to the existing electrical wires, following the manufacturer's instructions and adhering to electrical codes. Securely fasten all wires and ensure they are properly insulated.
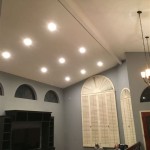
Mounting the Light Box: Carefully insert the light box into the dropped ceiling grid. Align the box with the marked location and gently push it into place. Adjust the suspension wires or springs to ensure the box sits level and securely in the grid.
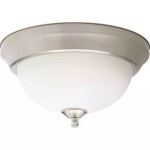
Installing the Lenses and Ballasts: Insert the light lenses into the light box frame, ensuring they are properly aligned and fit snugly. Connect the ballasts to the light box and secure them in place. The ballasts provide the necessary electrical current to power the lamps.
Inserting the Lamps: Carefully insert the fluorescent or LED lamps into the light box. Ensure the lamps are properly seated in their sockets and make sure they are compatible with the light box and ballasts. Secure the lamps in place according to the manufacturer's guidelines.
Testing and Maintenance: Once the installation is complete, turn on the lighting system to test its functionality. Ensure all lamps are illuminated properly and adjust the light output as desired. Periodically inspect the light boxes for any signs of wear or damage, and replace lamps as needed to maintain optimal light levels.
By following these essential steps, you can confidently install dropped ceiling light boxes that seamlessly enhance the lighting in your space. Remember to prioritize safety, adhere to electrical codes, and consult the manufacturer's instructions for specific installation requirements.

How To Build A Dropped Ceiling Box

How To Build A Dropped Ceiling Box

How To Build A Dropped Ceiling Box

How To Build A Dropped Ceiling Box

How To Build Diffe Shapes For Dropped Ceiling Boxes

Diy A Dropped Ceiling With Lighting

Kitchen Lighting Ceiling Light Box Diy Doctor

How To Build A Dropped Ceiling Box

Diy Dropped Ceiling Kit Stellar Lighting

Paramount Construction
Related Posts