How to Remove a Ceiling Fan Light Fixture
Removing a ceiling fan light fixture is a relatively simple task that can be completed in a few steps. Whether you're replacing an old fixture or simply want to give your room a new look, following these instructions will help ensure a safe and successful removal.
Safety Precautions
Before beginning any electrical work, it's crucial to take safety precautions. Turn off the power to the ceiling fan circuit at the breaker panel. Test the power by turning on the fan; if it doesn't operate, the power is off.
Use a sturdy ladder or step stool to reach the ceiling fan. Ensure the ladder is stable and placed on a flat surface. Wear safety glasses and gloves to protect your eyes and hands during the removal process.
Removing the Light Fixture
Locate the canopy or cover that conceals the electrical connections. It is typically held in place by screws or clips.
Gently pull down on the canopy to detach it from the ceiling fan body. Be cautious not to pull too hard, as wires may still be connected.
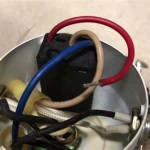
Once the canopy is removed, you will see the electrical wires connected to the light fixture.
Identify the wires that connect the light fixture to the ceiling fan. These wires will typically be black (hot), white (neutral), and green or bare copper (ground).
Using a screwdriver or pliers, carefully disconnect the wires from the light fixture. Twist the wire nuts counterclockwise to loosen them.
Once the wires are disconnected, you can remove the light fixture by unscrewing the mounting screws. Some fixtures may have a locking mechanism that requires you to press a button or lever before unscrewing the screws.
Carefully lower the light fixture from the ceiling fan body. Support it with one hand while detaching it completely.
Disposing of the Old Fixture
Once the light fixture is removed, it's important to dispose of it properly. If the fixture contains fluorescent bulbs, they should be disposed of at a hazardous waste facility.
The metal components of the fixture can typically be recycled at a local scrap metal yard.
Installing a New Fixture
If you're installing a new light fixture, reverse the removal steps to install it.
Connect the wires from the new fixture to the wires on the ceiling fan, ensuring the colors match (black to black, white to white, green or bare copper to green or bare copper).
Secure the light fixture to the ceiling fan body with the mounting screws.
Reattach the canopy to the ceiling fan body.
Turn on the power at the breaker panel and test the light fixture to ensure it's working properly.
Congratulations! You have successfully removed and installed a ceiling fan light fixture.

4 Ways To Replace A Light Bulb In Ceiling Fan Wikihow

How To Replace A Ceiling Fan With Pendant Light

4 Ways To Replace A Light Bulb In Ceiling Fan Wikihow
Replacing A Ceiling Fan Light With Regular Fixture Jlc

4 Ways To Replace A Light Bulb In Ceiling Fan Wikihow
Ceiling Fan Light Fixture Replacement Ifixit Repair Guide

How To Replace A Ceiling Fan Light Kit

Replacing A Ceiling Fan Light With Regular Fixture Jlc

How To Remove A Ceiling Fan The Home Depot

How To Remove A Ceiling Fan Hunter
Related Posts


