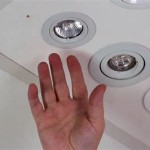
Understanding Ceiling Spot Light Wiring Diagrams: A Comprehensive Guide
Installing ceiling spot lights can enhance the ambiance and functionality of your living space. However, proper wiring is crucial to ensure a safe and efficient electrical system. Understanding the basics of ceiling spot light wiring diagrams is essential for a successful installation.
Components of a Ceiling Spot Light Wiring Diagram
A typical ceiling spot light wiring diagram consists of several key components:
- Power Source: The power source, typically a circuit breaker or fuse box, provides electricity to the lighting system.
- Switch: A wall-mounted switch controls the on/off function of the lights.
- Junction Box: A junction box houses all the electrical connections within the ceiling.
- Spot Light Fixtures: Individual spot light fixtures are connected to the wiring within the junction box.
- Wires: Electrical wires carry electricity from the power source to the switch, junction box, and fixtures.
Types of Wiring Diagrams for Ceiling Spot Lights
There are two main types of wiring diagrams for ceiling spot lights:
- Parallel Wiring: In this setup, each spot light fixture is connected individually to the power source. This allows for independent control of each light.
- Series Wiring: In series wiring, the spot light fixtures are daisy-chained together, with the current flowing through each fixture in sequence. This setup is less common and less flexible than parallel wiring.
Step-by-Step Wiring Instructions
Follow these general steps to wire ceiling spot lights using a parallel wiring diagram:
- Turn Off Power: Before starting any electrical work, ensure the power is turned off at the circuit breaker or fuse box.
- Install Junction Box: Mount the junction box securely to the ceiling and connect the wires from the power source and switch to the junction box.
- Connect Spot Light Fixtures: Run wires from the junction box to each spot light fixture and connect the wires according to the wiring diagram.
- Install Fixtures: Position the spot light fixtures in their desired locations and secure them to the ceiling.
- Turn On Power: Once all connections are made, turn on the power at the circuit breaker or fuse box and test the lights to ensure they are working properly.
Safety Precautions
When working with electrical wiring, it is essential to follow these safety precautions:
- Always turn off power before starting any work.
- Use proper tools and materials.
- If you are unsure about any part of the installation, consult a qualified electrician.
By understanding the essential aspects of ceiling spot light wiring diagrams, you can confidently install and enhance the lighting in your home. Remember to prioritize safety and follow the instructions carefully for a successful installation.

Connecting Cur Controlled Led Spotlights Do S And Don Ts Customer Service Q

Connecting Cur Controlled Led Spotlights Do S And Don Ts Customer Service Q

Colour Changing Rgb Led Spotlights Wiring Schematics

Connecting Cur Controlled Led Spotlights Do S And Don Ts Customer Service Q

Colour Changing Rgb Led Spotlights Wiring Schematics

Colour Changing Rgb Spotlight Litewave

Wiring Up 6 X 240v 50w Spotlights Diynot Forums

How To Wire A Light Switch Downlights Co

How To Wire Downlights A Switch Simple Diagram Led Lighting Info

Wiring Up 6 X 240v 50w Spotlights Diynot Forums

