Essential Aspects of Removing a Ceiling Fixture Box
When renovating or rewiring a room, removing a ceiling fixture box may become necessary. Whether you're dealing with an outdated fixture or need to access the electrical wires behind it, understanding the proper steps involved is crucial. This article will guide you through the essential aspects of removing a ceiling fixture box safely and effectively.
Safety Precautions
Before starting any electrical work, ensure the electricity to the room is turned off at the main breaker or fuse box. Wear safety glasses and gloves to protect yourself from potential hazards. If you're not comfortable working with electricity, consider consulting a qualified electrician for assistance.
Tools and Materials
To remove a ceiling fixture box, you will need the following tools and materials:
- Screwdriver (Phillips or flathead, depending on the fixture box)
- Wire cutters or strippers
- Electrical tape
- Screws (if the new fixture box requires them)
- New fixture box (if replacing the old one)
Steps for Removal
Once you have gathered the necessary tools and materials, follow these steps to remove the ceiling fixture box:
- Remove the Fixture: Unscrew the bolts or screws holding the fixture in place and carefully disconnect the wires from the fixture. Gently lower the fixture from the box.
- Disconnect the Wires: Turn off the electricity to the room at the breaker or fuse box. Locate the electrical wires connected to the fixture box and carefully disconnect them. Use wire cutters or strippers to trim any excess wire and insulate the exposed wires with electrical tape.
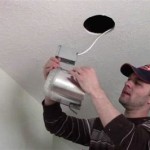
- Unscrew the Box: Identify the screws holding the fixture box to the ceiling and unscrew them. If the box is mounted on a bracket, remove the bracket from the ceiling as well.
- Remove the Box: If the fixture box is attached to a metal bracket, gently pull it loose. If it's attached directly to the ceiling, carefully pry it out with a screwdriver or other suitable tool. Avoid damaging the ceiling or wires during this process.
- Prepare for Replacement: If you're replacing the fixture box, insert the new box into the hole in the ceiling and secure it with screws. Connect the electrical wires to the new box and insulate the connections with electrical tape.
Troubleshooting Tips
If you encounter any problems while removing the ceiling fixture box, here are some troubleshooting tips:
- Stuck Screws: If the screws are stuck or stripped, use a screwdriver with a tighter fit or a penetrating lubricant.
- Loose Wires: Ensure that the electrical wires are securely connected to the fixture box and insulated with electrical tape.
- Damaged Ceiling: If the ceiling is damaged while removing the box, repair it with drywall or plaster before installing a new fixture.
Removing a ceiling fixture box can be a straightforward task with proper preparation and safety precautions. By following the steps outlined in this article, you can confidently handle this electrical task and ensure a safe and functional lighting fixture.

Removing A Fluorescent Kitchen Light Box The Kim Six Fix

How To Remove Replace This Ceiling Junction Box R Askanelectrician

Removing Ceiling Electrical Box Doityourself Com Community Forums

How Do I Remove This Ceiling Electrical Box R Home

Removing Recessed Box Fluorescent Lighting Hometalk

Removing A Fluorescent Kitchen Light Box The Kim Six Fix

Removal Of An Old Light Ceiling Box For A Fan Install Doityourself Com Community Forums

How To Replace An Old Fluorescent Light Fixture Young House Love
Old Light Fixture Box Is Broken Diy Home Improvement Forum

How To Remove Replace This Ceiling Junction Box R Askanelectrician
Related Posts


