How to Put Can Lights in a Drop Ceiling
### Introduction Drop ceilings are a popular choice for commercial and residential spaces due to their versatility and ease of installation. They allow for the integration of lighting fixtures, such as can lights, to enhance illumination and create the desired ambiance. Installing can lights in a drop ceiling is a relatively straightforward process that can be completed with basic tools and materials. ### Materials Required * Can lights * Electrical wire (14-gauge or 12-gauge) * Wire connectors * Electrical tape * Drywall saw or hole saw * Drill * Measuring tape * Pencil * Safety glasses * Gloves ### Step-by-Step Guide1. Determine the Location and Layout:
* Measure the ceiling area and determine the placement of the can lights. * Mark the locations on the ceiling grid with a pencil. * Ensure that the spacing between the can lights is appropriate for the desired level of illumination.2. Cut the Ceiling Tiles:
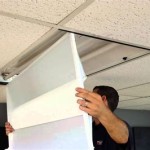
* Wear safety glasses and gloves. * Use a drywall saw or hole saw to cut holes in the ceiling tiles corresponding to the markings. * The holes should be slightly larger than the diameter of the can lights.3. Run the Electrical Wiring:
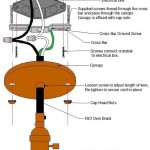
* Feed the electrical wire through the holes in the ceiling tiles. * Connect the wire to the junction box or existing wiring in the ceiling. * Use wire connectors to secure the connections and wrap them with electrical tape.4. Mount the Can Lights:
* Lift the can lights into the holes in the ceiling tiles. * Twist the can lights clockwise to secure them to the electrical box. * Ensure that the can lights are level and flush with the ceiling.5. Connect the Can Lights:
* Connect the electrical wires from the can lights to the wires from the electrical box. * Use wire connectors and electrical tape to secure the connections.6. Test the Lights:
* Switch on the breaker or fuse to power the lights. * Test each can light to ensure that it is working properly.7. Trim Ring Installation (Optional):
* If desired, install trim rings around the can lights to enhance their appearance and provide a clean finish. * Click the trim ring into place around the can light. ### Safety Precautions * Always turn off the electricity before working on electrical components. * Wear proper safety gear, including gloves and safety glasses. * Use the appropriate tools for cutting and drilling. * Handle electrical wires and connections with care. * If you are not confident in your electrical skills, it is advisable to consult with a qualified electrician.
How To Install Recessed Lights In A Drop Ceiling Temecula Handyman
How To Install Lighting In Your Ceiling Kanopi By Armstrong

Install Lighting In A Suspended Ceiling Doityourself Com

Operation Laundry Room Lighting Reality Daydream

Diy Recessed Lighting Installation In A Drop Ceiling Tiles Part 3 Super Nova Adventures

How To Change Downlights Or Recessed Lights In False Ceiling Electrician Singapore Recommended Services

How To Put Recessed Lights In The Ceiling

Drywall Suspended Grid Showroom Ceiling Systems How To Install Pictures Of Tips For Installing Drop Ceilings Strictly Racine Wisconsin

Drop Ceiling Installation How To Install A Homeserve Usa

Installing Woodhaven Planks And Hiding Drop Ceiling Grid Sawdust Girl
Related Posts

