How to Install a Ceiling Fan (Essential Aspects)
Installing a ceiling fan can be a great way to improve the comfort and efficiency of your home. By circulating air, a ceiling fan can help to keep you cool in the summer and warm in the winter. It can also help to reduce energy costs by reducing the need for air conditioning or heating.
If you're considering installing a ceiling fan, there are a few things you'll need to keep in mind. First, you'll need to choose the right size and type of fan for your space. Once you have your fan, you'll need to decide where to install it and how to wire it up. With a little planning and preparation, you can install a ceiling fan yourself in a few hours.
Choosing the Right Fan
The first step in installing a ceiling fan is to choose the right fan for your space. The size of the fan you need will depend on the size of your room. For a small room, a 30-inch fan will be sufficient. For a medium-sized room, a 42-inch fan is a good choice. And for a large room, you'll need a fan that's 52 inches or larger.
In addition to the size of the fan, you'll also need to consider the style of the fan. There are many different styles of ceiling fans available, so you're sure to find one that matches the décor of your room. If you're not sure what style to choose, you can visit a home improvement store or online retailer to browse their selection.
Installing the Fan
Once you have your fan, you'll need to decide where to install it. The best place to install a ceiling fan is in the center of the room. This will ensure that the fan circulates air evenly throughout the space.
Once you've chosen a location for your fan, you'll need to prepare the electrical wiring. If you're not comfortable working with electrical wiring, you may want to hire an electrician to do this for you.
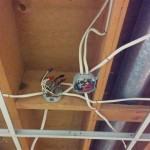
To prepare the electrical wiring, you'll need to turn off the power to the room at the circuit breaker or fuse box. Then, you'll need to remove the existing light fixture and disconnect the wires.
Next, you'll need to connect the wires from your fan to the wires in the ceiling. Make sure to connect the wires of the same color together. Once the wires are connected, you can mount the fan to the ceiling and secure it with the included hardware.
Finally, you can turn the power back on and test your fan to make sure it's working properly.
Tips for Installing a Ceiling Fan
Here are a few tips for installing a ceiling fan:
- Make sure to turn off the power before you start working on the electrical wiring.
- If you're not comfortable working with electrical wiring, hire an electrician to do it for you.
- Choose the right size and style of fan for your space.
- Install the fan in the center of the room for optimal air circulation.
- Test the fan to make sure it's working properly before you leave the room.

Wiring A Ceiling Fan And Light With Diagrams Ptr

Installing A Ceiling Fan With These Helpful Tips Petersen Electric

How To Install A Ceiling Fan Light Kit Shockley Electric

Lighting Ceiling Fan Installation From Lowe S

How To Replace A Ceiling Fan Light Kit Smafan Com

How To Install A Ceiling Fan Diy Family Handyman
Replacing A Ceiling Fan Light With Regular Fixture Jlc

Ceiling Fan Light Kit Installation How To

How To Install A Ceiling Fan Brennan Electric In Seattle Wa

4 Ways To Replace A Light Bulb In Ceiling Fan Wikihow
Related Posts


