Essential Aspects of Removing an Old Ceiling Light
Replacing an outdated ceiling light can transform the ambiance of a room, infusing it with a fresh and updated look. While this task may seem daunting, it's a straightforward process that can be accomplished with a few essential tools and basic electrical knowledge. This comprehensive guide will provide step-by-step instructions, safety tips, and expert insights to ensure a successful and safe removal of your old ceiling light.
Safety First
Electrical work poses potential hazards, so prioritize safety by following these precautions:
- Turn off the power to the circuit before starting any work.
- Wear gloves and safety glasses while handling electrical components.
- Use a voltage tester to verify that the power is off.
- If you're unsure about any aspect of the process, consult a licensed electrician.
Step-by-Step Guide
1. Gather Tools and Materials:- Step ladder
- Screwdriver or drill
- Voltage tester
- Electrical tape (optional)
- Flip the circuit breaker or remove the fuse to cut off power to the ceiling light.
- Use a voltage tester to confirm that the power is off.
- Locate the cover plate screws and unscrew them to remove the cover.
- Identify the wires connected to the light fixture. Typically, the black wire is the "hot" wire, the white wire is the "neutral" wire, and the green or bare copper wire is the "ground" wire.
- Loosen the terminal screws using a screwdriver or drill.
- Carefully disconnect the wires by gently pulling them out of the terminals.
- If there are any wire nuts, twist them off and insulate the wires with electrical tape for safety.
- Locate the screws or bolts that hold the light fixture in place.
- Unscrew or unbolt the mounting and carefully remove the light fixture.
- Inspect the junction box (where the wires are connected) for any damage or loose connections.
- If necessary, tighten any loose screws or replace damaged components.
- If desired, wrap electrical tape around the wire ends to prevent them from touching and creating a potential hazard.
Expert Tips
- Label the wires before disconnecting them to ensure proper reconnection later.
- Use a wire stripper to remove a small amount of insulation from the wire ends before reconnecting them.
- Tighten the terminal screws firmly, but avoid overtightening.
- After reconnecting the wires, double-check their connections with a voltage tester before turning the power back on.
Conclusion
Removing an old ceiling light is an achievable DIY task with careful preparation and safety precautions. By following these steps, you can successfully replace your outdated light fixture with a new one, adding a touch of style and functionality to your home. Remember, if you have any concerns or encounter electrical issues beyond your expertise, always seek the assistance of a licensed electrician for professional guidance and support.

How To Change A Ceiling Light Making Maanita

How To Replace Install A Light Fixture The Art Of Manliness

How To Replace An Old Fluorescent Light Fixture Young House Love
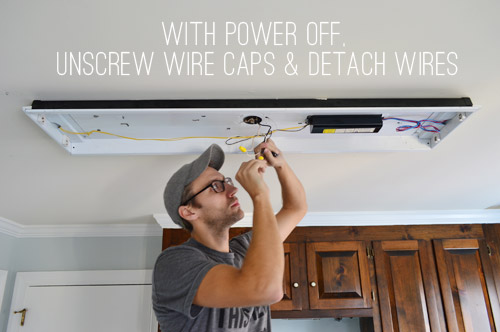
How To Replace An Old Fluorescent Light Fixture Young House Love

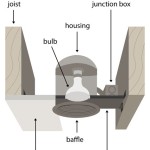
How To Remove Old Recessed Light Housing For A Lighting Makeover

Modern Ceiling Lights Home Repair Tutor

How To Replace An Old Fluorescent Light Fixture Young House Love

How To Replace Install A Light Fixture The Art Of Manliness

Modern Ceiling Lights Home Repair Tutor

How To Change Your Light Fixture In Seven Easy Steps A Pinch Of Joy
Related Posts

