How to Change Out a Ceiling Light Fixture: A Comprehensive Guide
Upgrading your ceiling light fixture can instantly transform the ambiance of a room. Whether you're replacing an outdated fixture or adding a modern touch, changing a ceiling light is a relatively simple DIY project that can be completed in a few easy steps.
Safety First
Before you begin, ensure your safety by following these precautions:
- Turn off the power to the light fixture at the circuit breaker or fuse box.
- Use a voltage tester to confirm that the power is off.
- Wear safety glasses and gloves to protect yourself from any hazards.
Gather Your Tools
To complete the job, you will need the following tools:
- New ceiling light fixture
- Screwdriver (Phillips or flathead, depending on the fixture)
- Wire strippers
- Electrical tape
- Ladder or step stool
Step-by-Step Instructions
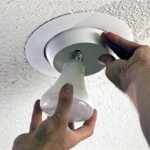
1. Remove the Old Fixture
- Unscrew the screws holding the fixture to the ceiling junction box.
- Carefully pull the fixture down far enough to access the electrical wires.
- Disconnect the wires by unscrewing the wire nuts or using a screwdriver to disconnect the terminals.
- Remove the mounting bracket or canopy from the junction box.
2. Prepare the New Fixture
- Unpack the new fixture and identify the wires: black (hot), white (neutral), and green or bare copper (ground).
- Strip about 1/2 inch of insulation from the ends of the fixture wires.
3. Wire the Fixture
- Twist the black wire from the fixture with the black wire from the ceiling. Repeat for the white wires.
- Secure the wire connections with wire nuts and tighten them by hand until they are snug.
- Wrap electrical tape around each wire nut to insulate the connections.
- Twist the green or bare copper wire from the fixture with the green or bare copper wire from the ceiling and secure it with a wire nut.
4. Install the New Fixture
- Carefully lift the wired fixture into the junction box and align the mounting screws.
- Tighten the screws to secure the fixture.
- Install the mounting bracket or canopy and secure it.
5. Finalize the Installation
- Screw in the light bulbs or LED panels according to the manufacturer's instructions.
- Turn on the power at the circuit breaker or fuse box.
- Test the light fixture to ensure it is working correctly.
Troubleshooting Tips
If you encounter any issues during the installation process, try the following troubleshooting tips:
- The light won't turn on: Double-check the wire connections and ensure the power is turned on.
- The light is flickering: Loose wire connections can cause flickering. Tighten all connections and ensure the wire nuts are secure.
- Electrical buzzing: A loose connection or faulty wiring can cause buzzing. Check the connections and consult an electrician if necessary.
Conclusion
Changing out a ceiling light fixture is a manageable DIY project that can enhance the style and functionality of your home. By following these step-by-step instructions and adhering to safety precautions, you can complete the job confidently and efficiently.

How To Replace Install A Light Fixture The Art Of Manliness

Mounting Light Fixtures Fine Homebuilding

How To Change Your Light Fixture In Seven Easy Steps A Pinch Of Joy

How To Replace A Ceiling Light Home

How To Replace A Ceiling Fan With Pendant Light

Replacing A Ceiling Fan Light With Regular Fixture Jlc

How To Install Ceiling Light Homeserve Usa

How To Install A Ceiling Light Fixture Diy Family Handyman

How To Change A Ceiling Light With Pictures Wikihow

How To Install A Ceiling Light Fixture Diy Family Handyman
Related Posts


