Mount Ceiling Lights: A Comprehensive Guide to Essential Aspects
Mount ceiling lights are a crucial component of any home's lighting system, providing illumination and elevating the aesthetic appeal of the space. However, installing these lights can be a daunting task for those unfamiliar with electrical work. This guide aims to demystify the process by outlining the essential aspects of mount ceiling light installation, ensuring a safe and successful outcome.
1. Safety First
Before commencing any electrical work, ensure your safety by following these precautions:
- Turn off the power at the circuit breaker or fuse box.
- Wear appropriate safety gear such as gloves and eye protection.
- Use a voltage tester to confirm that the wires are not live.
2. Gather Your Tools and Materials
To install mount ceiling lights, you will need the following tools and materials:
- Mount ceiling light
- Screwdriver
- Drill (if necessary)
- Wire nuts
- Electrical tape
- Screws (supplied with the light)
- Level
3. Determine the Mounting Location
Plan the placement of the mount ceiling light carefully. Consider the size, shape, and height of the room to ensure adequate illumination and aesthetic harmony.
- Measure the desired height from the ceiling and mark the location with a pencil.
- Use a level to ensure the light is mounted straight.
4. Prepare the Electrical Box
Ceiling lights require an electrical box for support and electrical connections. If there is no existing electrical box at the desired location, you will need to install one.
- Drill a hole in the ceiling where the box will be located.
- Insert the box into the hole and secure it with screws.
- Run the electrical wires from the ceiling junction box to the electrical box you just installed.
5. Connect the Wires
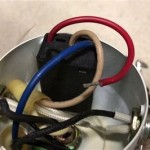
Connect the wires from the electrical box to the wires of the mount ceiling light:
- Match the white wire (neutral) from the electrical box to the white wire from the light.
- Match the black wire (hot) from the electrical box to the black wire from the light.
- Use wire nuts to secure the connections and cover them with electrical tape for insulation.
6. Mount the Light
Once the wires are connected, you can mount the light to the electrical box:
- Position the mounting bracket of the light over the electrical box.
- Secure the light to the box using the screws provided.
7. Finishing Touches
After the light is mounted, complete the installation by checking and tightening all the connections. Then, turn on the power at the circuit breaker or fuse box and test the light to ensure it operates correctly.
Conclusion
Mount ceiling lights are a versatile and practical addition to any home. By following the steps outlined in this guide, you can ensure a safe and successful installation. Remember to prioritize safety, gather the necessary tools and materials, and pay attention to the details. With a little planning and care, you can enjoy the benefits of well-installed mount ceiling lights, enhancing the ambiance and functionality of your space.

Mounting Light Fixtures Fine Homebuilding

How To Install Ceiling Light Homeserve Usa

How To Install A Lighting Fixture Forbes Home

How To Choose And Install Indoor Led Ceiling Light Knowledge Shaanxi Yahua Lighting Electric Equipment Co Ltd

How To Install A Vintage Ceiling Light Fixture Simple Decorating Tips
:max_bytes(150000):strip_icc()/installing-a-pendant-light-2175009-01-ed4c5a36391942b683ab0a5e7b5361b9.jpg?strip=all)
How To Install A Pendant Light

How To Install Ceiling Light Fixtures Ehow

Mounting Light Fixtures Fine Homebuilding

Commercial Electric 9 In Color Selectable Led Flush Mount Ceiling Light W Night Optional White And Brushed Nickel Trim Rings 56582191 The Home Depot

How To Install A New Light Fixture Apartment Therapy
Related Posts


