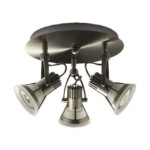
How to Install Ceiling Light Wiring
Installing ceiling light wiring can seem like a daunting task, but it's a relatively straightforward process that can be completed in a few hours with the right tools and materials. Here's a step-by-step guide to help you get started:
Step 1: Gather Your Tools and Materials
Before you begin, make sure you have all the necessary tools and materials. You'll need the following:
- Ceiling light fixture
- Electrical wire (14-gauge or 12-gauge)
- Wire connectors
- Electrical tape
- Screwdriver
- Drill
- Safety glasses
Step 2: Turn Off the Power
Safety first! Before you start working on the electrical wiring, turn off the power to the circuit that controls the ceiling light. You can do this by flipping the breaker in your electrical panel.
Step 3: Remove the Old Light Fixture
If there's an existing light fixture in place, you'll need to remove it before installing the new one. To do this, simply unscrew the canopy (the decorative cover that surrounds the base of the fixture) and disconnect the wires.
Step 4: Prepare the Electrical Wire
Cut the electrical wire to the desired length. The wire should be long enough to reach from the ceiling box to the light fixture without being too loose or too tight.
Strip the insulation off the ends of the wire about 1/2 inch. This will expose the copper conductors.
Step 5: Connect the Wires
Connect the black wire from the ceiling box to the black wire on the light fixture. Connect the white wire from the ceiling box to the white wire on the light fixture. Connect the ground wire (usually green or bare copper) from the ceiling box to the ground wire on the light fixture.
Use wire connectors to secure the connections. Make sure the connections are tight and secure.
Step 6: Wrap the Wires with Electrical Tape
Once the wires are connected, wrap them with electrical tape to insulate them and prevent them from shorting out.
Step 7: Mount the Light Fixture
Place the light fixture over the ceiling box and secure it with the screws provided.
Step 8: Turn on the Power
Turn on the power to the circuit and test the light fixture to make sure it works properly.
Additional Tips
- If you're not comfortable working with electricity, it's best to hire a qualified electrician.
- Make sure the ceiling box is securely mounted and can support the weight of the light fixture.
- Use a level to ensure that the light fixture is hanging straight.
- If you're installing a dimmer switch, make sure the light fixture is compatible with dimmers.

How To Install A Ceiling Light Fixture Diy Family Handyman

How To Install A Ceiling Light Fixture Diy Family Handyman

How To Install A Ceiling Light Fixture Diy Family Handyman

Replacing A Ceiling Fan Light With Regular Fixture Jlc

How To Install A Ceiling Light Fixture Diy Family Handyman

Mounting Light Fixtures Fine Homebuilding
Replacing A Ceiling Fan Light With Regular Fixture Jlc

How To Install A Light Fixture Step By The Diy Playbook

How To Replace Install A Light Fixture The Art Of Manliness

How To Install A Light Fixture Diy Home Improvement
Related Posts


