Progress Lighting Ceiling Fan Installation: A Comprehensive Guide
Installing a Progress Lighting ceiling fan is a straightforward task that can be completed in a few hours with the right tools and a little patience. Here's a comprehensive guide to help you navigate the process:
Tools and Materials Required:
- Ceiling fan
- Phillips head screwdriver
- Wrench or pliers
- Wire cutters
- Electrical tape
- Ladder
- Safety glasses
- Optional: Outlet tester
Safety Precautions:
- Turn off the power to the ceiling fan circuit at the electrical panel.
- Wear safety glasses to protect your eyes from falling debris.
- Use a sturdy ladder and always have a spotter assist you.
Step-by-Step Instructions:
1. Mount the Ceiling Bracket:
- Locate the electrical box on the ceiling and turn off the power.
- Attach the ceiling bracket to the electrical box using the screws provided.
2. Assemble the Fan Motor:
- Unpack the fan motor and lay it out on a flat surface.
- Attach the downrod to the motor housing, inserting the ball at the bottom of the downrod into the socket in the motor.
- Secure the downrod with the provided screws.
3. Wire the Fan Motor:
- Connect the black wire from the fan motor to the black wire from the ceiling box.
- Connect the white wire from the fan motor to the white wire from the ceiling box.
- Connect the green or bare copper wire from the fan motor to the ground wire from the ceiling box.
- Twist the wires together and secure them with electrical tape.
4. Hang the Fan Motor:
- Carefully lift the fan motor and align it with the ceiling bracket.
- Insert the hook on the fan motor into the ball joint on the ceiling bracket.
- Tighten the screws on the ceiling bracket to secure the fan motor.
5. Install the Blades:
- Unpack the fan blades and align them with the mounting brackets on the fan motor.
- Insert the screws through the mounting brackets and tighten them.
- Make sure all blades are securely attached.
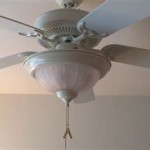
6. Install the Light Kit (Optional):
- Unpack the light kit and connect the wires according to the instructions provided.
- Lift the light kit and align it with the mounting bracket on the fan motor.
- Tighten the screws to secure the light kit.
7. Test the Fan:
- Turn on the power at the electrical panel.
- Use the remote control or wall switch to operate the fan.
- Check that the fan spins smoothly and there are no unusual noises.
Maintenance:
Regularly clean your Progress Lighting ceiling fan with a soft cloth to remove dust and debris. Occasionally, you may need to lubricate the bearings on the motor to ensure smooth operation.

Progress Lighting Airpro Builder 42 In Indoor Antique Broe Rustic Ceiling Fan P2500 20 The Home Depot

Progress Lighting Airpro 52 In Brushed Nickel 5 Blade Indoor Ac Motor Transitional Ceiling Fan P250080 009 The Home Depot

Progress Lighting Airpro Builder Fan 52 In Matte Black Indoor Ceiling 5 Blade The Fans Department At Com

Progress Lighting Airpro 52 In White Led 5 Blade Indoor Ac Motor Transitional Ceiling Fan With Light P250082 030 Wb The Home Depot

Progress Lighting Airpro E Star Fan 52 In Brushed Nickel Led Indoor Ceiling With Light 5 Blade The Fans Department At Com

Progress Lighting P250080 015 52 Ceiling Fan Airpro Builder Polished Chrome Design

Progress Lighting Airpro 52 In White 5 Blade Indoor Energy Star Rated Ac Motor Transitional Ceiling Fan With Light P250077 030 Wb The Home Depot

Progress Lighting P250007 009 30 Claret 54 Inch Brushed Nickel Ceiling Fan With Led Light Delmarfans Com

Progress P2525 30 Airpro Hugger 52 Inch White Ceiling Fan

Progress Lighting
Related Posts


