Ceiling Fan With Light Instructions: A Comprehensive Guide
Ceiling fans with lights are an excellent way to improve airflow and illumination in any room. Installing them can be a relatively straightforward task with the right instructions and a little patience. This guide will provide detailed instructions on how to install a ceiling fan with light, covering all the essential aspects.
Pre-Installation Considerations
Before you begin the installation process, it is crucial to consider a few important factors:
- Safety First: Turn off the electricity at the circuit breaker or fuse box before starting any electrical work.
- Ceiling Height: Ensure that the ceiling is high enough to accommodate the ceiling fan. Measure from the floor to the ceiling and subtract 8-10 inches.
- Fan Size: Choose a fan size appropriate for the room area. Use the following rule of thumb:
- Rooms up to 100 sq. ft.: 29-36 inch fan
- Rooms up to 150 sq. ft.: 36-42 inch fan
- Rooms up to 200 sq. ft.: 44-52 inch fan
- Electrical Requirements: Make sure the ceiling electrical box is rated for the fan's weight and has two separate circuits, one for the fan and one for the light.
Tools and Materials Needed
To install a ceiling fan with light, you will need the following tools and materials:
- Ceiling fan with light
- Mounting bracket
- Electrical wires (14 gauge or larger)
- Wire connectors
- Screwdriver (Phillips and flat head)
- Drill
- Level
- Ladder
- Safety glasses
Step-by-Step Installation Instructions
1. Mount the Bracket
Attach the mounting bracket to the electrical box on the ceiling using the supplied screws. Ensure that the bracket is securely fastened.
2. Connect the Wires
Connect the electrical wires from the ceiling fan to the corresponding wires on the mounting bracket. Typically, black wires connect to black wires, white wires to white wires, and green (or bare copper) wires to the ground wire.
3. Hang the Fan
Lift the fan and align the mounting holes on the canopy with the mounting holes on the bracket. Carefully slide the fan onto the bracket and secure it with the provided bolts.
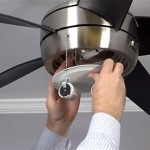
4. Install the Light Kit
If the fan has a light kit, assemble the light fixture according to the manufacturer's instructions. Insert the light bulbs into the sockets and attach the light kit to the fan body.
5. Install the Blades
Attach the fan blades to the hub of the fan using the supplied screws. Ensure that the blades are balanced and the screws are tightened securely.
6. Connect the Remote Control (if applicable)
If your ceiling fan comes with a remote control, follow the manufacturer's instructions to pair the remote with the fan and install the receiver.
7. Restore Power and Test
Turn the electricity back on at the circuit breaker or fuse box. Test the fan to ensure it is working correctly, including the light and any additional features.
Safety Tips
To ensure a safe installation, follow these safety tips:
- Always wear safety glasses.
- Turn off the electricity before starting any electrical work.
- Make sure the ceiling fan is securely mounted.
- Do not exceed the maximum weight capacity of the ceiling box.
- Keep the fan blades balanced for proper operation.
Conclusion
Installing a ceiling fan with light can add both comfort and style to any room. By following these comprehensive instructions and safety tips, you can ensure a successful and safe installation. If you encounter any difficulties during the process, consulting an electrician is recommended.

Oyster Light For Ceiling Fan 21641 Clipsal

Wiring A Ceiling Fan And Light With Diagrams Ptr

Yaton St Cf220706 Ceiling Fan With Light Instruction Manual

Installation Instructions For Hunter Ceiling Fan

Yaton St Cf220706 Ceiling Fan With Light Instruction Manual

How To Install A Ceiling Fan Hunter

Installation Guide For Bruening 52 In Black Indoor Ceiling Fan With Light Kit And Remote Control

4 Ways To Replace A Light Bulb In Ceiling Fan Wikihow

Yoain Hdlp Cffl5209ac Light Pro 52 Inch Modern Led Indoor Matte Smart Ceiling Fan Installation Guide

Orren Ellis Led Bladeless Ceiling Fan Reviewed


