How to Install a Ceiling Fan Without Existing Wires
Installing a ceiling fan without existing wires might seem like a daunting task, but it's actually not as difficult as you might think. With some basic electrical knowledge and the right tools, you can easily add a ceiling fan to your room and enjoy the benefits of improved airflow and comfort.
Step 1: Safety First
Before you start any electrical work, make sure to turn off the power to the room at the circuit breaker or fuse box. This will help prevent any accidents or shocks.
Step 2: Gather Your Materials
To install a ceiling fan without existing wires, you'll need the following materials:
- Ceiling fan
- Electrical wire
- Electrical tape
- Wire nuts
- Screwdriver
- Drill
- Level
- Stud finder
Step 3: Choose the Location
Once you have your materials, it's time to choose the location for your ceiling fan. The ideal location is in the center of the room, but you may need to adjust it slightly to avoid any obstacles, such as light fixtures or doorways.
Step 4: Install the Electrical Junction Box
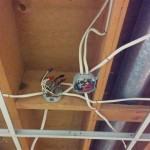
If there is no existing electrical junction box in the location you chose, you will need to install one. To do this, use a stud finder to locate a joist in the ceiling and mark the location. Then, drill a hole for the junction box and secure it with screws.
Step 5: Run the Electrical Wire
Now it's time to run the electrical wire from the junction box to the ceiling fan. To do this, simply cut a length of electrical wire and strip the ends. Then, feed the wire through the hole in the junction box and connect it to the wires from the ceiling fan. Be sure to use wire nuts to secure the connections and wrap them with electrical tape.
Step 6: Mount the Ceiling Fan
Once the electrical wire is connected, you can mount the ceiling fan to the junction box. To do this, simply lift the ceiling fan into place and secure it with the screws provided.
Step 7: Install the Fan Blades
The final step is to install the fan blades. To do this, simply attach the blades to the motor housing and tighten the screws. Be sure to balance the blades so that the fan runs smoothly.
Step 8: Finish Up
Once the fan blades are installed, you can turn on the power and test the fan. If it's running smoothly, you're all done!
Tips for Success
Here are some tips to help ensure a successful installation:
- Make sure to use the correct size electrical wire. For most ceiling fans, 14 gauge wire is sufficient.
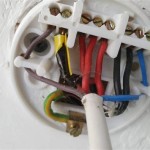
- Be sure to connect the wires correctly. The black wire from the ceiling fan should be connected to the black wire from the electrical wire. The white wire from the ceiling fan should be connected to the white wire from the electrical wire. The green wire from the ceiling fan should be connected to the bare copper wire from the electrical wire.
- Tighten all of the screws and connections securely. This will help prevent any problems down the road.
- If you're not comfortable working with electricity, it's best to hire a qualified electrician to install your ceiling fan.

Installing A Ceiling Fan Without Existing Wiring Electricians Talklocal Blog Talk Local

Installing A Ceiling Fan Without Existing Wiring Mr Electric
How To Install A Ceiling Fan Without Having Cut Into The Electrical Box No Attic Access Quora

Replacing A Ceiling Fan Light With Regular Fixture Jlc

Wiring A Ceiling Fan And Light With Diagrams Ptr
Can A Diy Er Install Ceiling Fan Quora

How To Install A Ceiling Fan Without Existing Wiring
How Can You Install A Ceiling Fan Without Existing Wires

How To Install A Ceiling Fan Where No Fixture Exists 8 Step Guide Home Inspector Secrets
How Can You Install A Ceiling Fan Without Existing Wires
Related Posts

