Essential Aspects of Hunter Ceiling Fan Light Kit Fix
Hunter ceiling fans are renowned for their exceptional quality and performance. However, like any other mechanical device, occasionally minor issues may arise, such as flickering or non-functional lights in your ceiling fan. These issues can often be resolved easily with a few simple steps.
Before embarking on any troubleshooting or repair, always ensure that the ceiling fan is safely turned off and disconnected from the power source. Use the following guidelines to effectively diagnose and fix common Hunter ceiling fan light kit issues:
1. Verify Power Source
Begin by checking if the power supply to the fan is adequate. Ensure that the wall switch controlling the fan is turned on, and examine the circuit breaker or fuse to confirm that it has not tripped. If necessary, reset the circuit breaker or replace the blown fuse.
2. Inspect the Light Bulb
A malfunctioning light bulb is a common reason for a non-illuminating fan light. Carefully remove the light bulb from the socket and examine it for burn marks or damage. If the bulb appears intact, try installing a new bulb to determine if this resolves the issue.
3. Check the Socket Switch
The socket switch is a mechanism that establishes electrical contact between the light bulb and the power source. If the socket switch malfunctions, it can prevent the light from turning on. Remove the light bulb and inspect the socket for any visible damage or loose connections. If necessary, replace the socket switch.
4. Examine the Remote Control or Wall Control
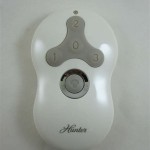
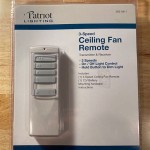
Hunter ceiling fans may be equipped with remote controls or wall controls for convenient operation. In the event that the light kit is not responding, examine the batteries in the remote control to ensure they are not depleted. If using a wall control, check for any loose connections or faulty wiring.
5. Inspect the Fan's Wiring
Carefully inspect the electrical wiring of the ceiling fan for any loose connections, frayed wires, or other visible damage. Ensure that all wire nuts are securely tightened and that no wires are exposed. If any damage is detected, it is recommended to seek professional assistance for repairs.
6. Check the Receiver Module
Hunter ceiling fans with integrated light kits often utilize a receiver module that communicates wirelessly with the remote control or wall control. If the receiver module malfunctions, it can disrupt the operation of the light kit. Inspect the receiver module for any signs of damage or loose connections.
7. Reset the Fan
Occasionally, resetting the ceiling fan can resolve minor glitches or software issues that may affect the operation of the light kit. To reset the fan, turn it off and disconnect it from the power source for a few minutes. Reconnect the fan and turn it back on.
8. Contact Hunter Support
If you have thoroughly checked all the above aspects and your Hunter ceiling fan light kit remains non-functional, it is recommended to contact Hunter's customer support for further troubleshooting and assistance. Their knowledgeable team can guide you through additional diagnostic steps or arrange for professional repair services.

How To Replace A Ceiling Fan Light Kit Smafan Com

Ceiling Fan Light Repair Home Tutor

Original Damp Rated Globe Light Kit White 99164 Hunter Fan

Oem Hunter K053208214 Light Kit Assembly Fix Com

Changing Ceiling Fan Light Kit Doityourself Com Community Forums

Oem Hunter K053208299 Light Kit Assembly Fix Com

How To Oil A Hunter Ceiling Fan In 5 Easy Steps

Hunter Newsome 52 In Indoor Premier Broe Bowl Light Kit Ceiling Fan 53311 The Home Depot

Hunter Newsome 52 In Indoor Premier Broe Bowl Light Kit Ceiling Fan 53311 The Home Depot

Hunter Breeze Gold 5 Blade Ceiling Fan With Pull Chain Amp Light Kit
Related Posts


